fun music worksheets pdf

Fun music worksheets PDFs are engaging, educational tools that make learning music interactive and enjoyable for kids. They cover notes, rhythm, instruments, and theory in an entertaining way, perfect for classrooms or homeschooling.

1.1 What Are Fun Music Worksheets?

Fun music worksheets PDFs are engaging, educational tools designed to make learning music interactive and enjoyable for kids. They cover topics like note names, rhythm, and musical instruments through colorful patterns, matching games, and creative exercises. These worksheets are suitable for pre-K to 6th grade, offering a playful way to introduce music theory and appreciation while fostering a love for music in a structured yet entertaining manner.

1.2 Benefits of Using Music Worksheets for Kids

Fun music worksheets PDFs offer numerous benefits for kids, fostering an engaging and interactive approach to music education. They help children develop essential skills like note recognition, rhythm, and musical instrument awareness while encouraging creativity and confidence. These worksheets cater to various learning styles, making music theory accessible and enjoyable. By providing structured yet entertaining activities, they support classroom and homeschool learning, ensuring kids build a strong foundation in music while having fun.

Types of Fun Music Worksheets

Fun music worksheets PDFs include activities like note naming, rhythm exercises, instrument-focused sheets, and music symbol recognition, offering a variety of engaging ways to learn music basics.

2.1 Note Naming and Rhythm Activities

Note naming and rhythm activities are essential in music education. These worksheets help students identify musical notes and understand rhythm through engaging exercises. Color-by-note and color-by-rhythm tasks make learning fun, while activities like matching games and tracing notes improve recognition. Rhythm exercises include identifying whole, half, quarter, and eighth notes, teaching timing and musical phrasing. These interactive PDFs cater to various learning styles, ensuring students grasp foundational music theory in an enjoyable and structured manner.

2.2 Musical Instrument Worksheets

Musical instrument worksheets introduce students to various instruments, their families, and sounds. These engaging PDFs feature activities like identifying instruments, labeling parts, and matching sounds to instruments. Interactive exercises include crosswords, word searches, and puzzles, making learning fun. Students explore orchestral and classroom instruments, enhancing their musical awareness. These worksheets cater to all ages, fostering an appreciation for diverse instruments and their roles in music, while reinforcing auditory and visual recognition skills in an enjoyable manner.

2.3 Music Symbols and Notation Exercises

Music symbols and notation exercises help students recognize and understand essential musical elements. Worksheets include activities like drawing clefs, line notes, and space notes, as well as exercises on stem direction and notating complete measures. These PDFs also feature vocabulary-building tasks, such as identifying dynamics (loud/soft) and tempo words (fast/slow). Interactive exercises make learning music symbols engaging, ensuring students grasp fundamental notation concepts in a fun and structured way, enhancing their music literacy skills effectively.

Age-Specific Worksheets

Age-specific music worksheets provide engaging activities for Pre-K, Kindergarten, elementary, and intermediate levels, featuring tracing notes, color-by-note, and matching games to make learning fun and effective.

3.1 Worksheets for Pre-K and Kindergarten

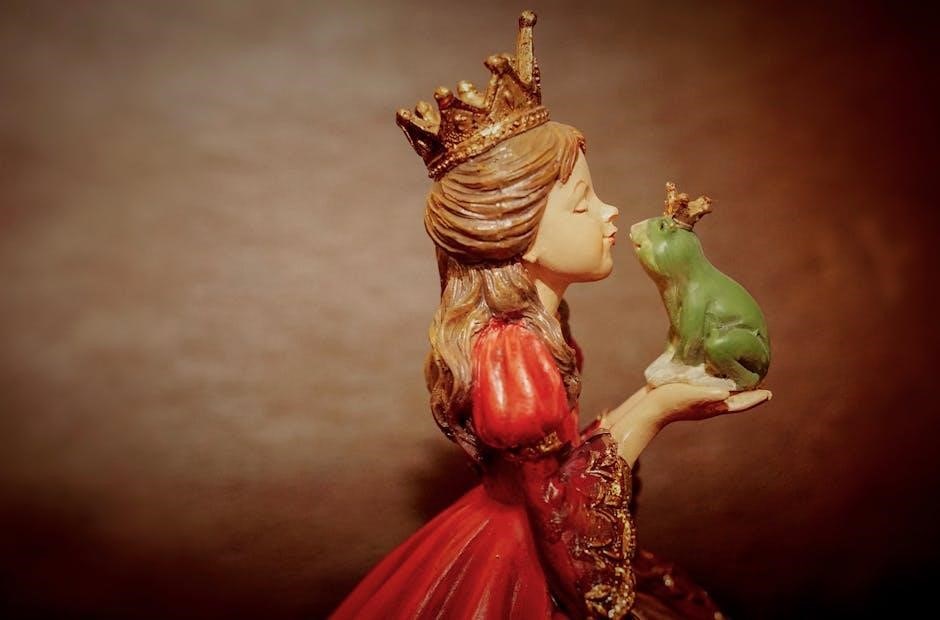
Pre-K and Kindergarten worksheets introduce young learners to music basics through fun, interactive activities. These include tracing notes, coloring instruments, and simple rhythm games. Designed for early childhood development, they focus on motor skills and creativity. Worksheets often feature themes like animals or princesses to keep kids engaged. Activities like “I Spy” music symbols and matching games help children recognize notes and sounds. These resources are perfect for classroom or homeschool use, making music learning playful and accessible for little ones.

3.2 Worksheets for Elementary Grades (1st to 6th Grade)

Worksheets for elementary grades (1st to 6th Grade) are designed to build foundational music skills through engaging activities. These include note naming, rhythm exercises, and instrument identification. Age-appropriate puzzles, word searches, and color-by-note tasks make learning fun. They also introduce music symbols, tempo, and dynamics. Themed exercises, such as princess or animal-themed sheets, keep students motivated. These resources align with classroom curricula, providing interactive ways to explore music theory and history while fostering creativity and musical understanding.

3.3 Intermediate and Advanced Levels

For intermediate and advanced students, fun music worksheets PDFs offer challenging yet engaging activities to deepen music theory knowledge. These include complex note naming, advanced rhythm exercises, and detailed music symbol identification. Resources like Hoffman Academy provide colorful, intermediate-level worksheets, while others offer advanced exercises in PDF format. These tools help older students refine their skills in composition, notation, and musical analysis, ensuring continued growth and mastery of music concepts in an enjoyable and structured way.

Free and Premium Resources

Explore a variety of free and premium music worksheet resources, offering downloadable PDFs for teachers and students to enhance music education with engaging activities.

4.1 Where to Find Free Music Worksheets

Discover a wide range of free music worksheets on trusted websites like Teachers Pay Teachers, Hoffman Academy, and Music Tech Teacher. These platforms offer downloadable PDFs packed with engaging activities, from note-naming games to rhythm exercises. Many sites provide free samples or entire collections, making it easy for educators and parents to access resources. Whether you’re teaching music theory basics or looking for fun exercises, these free resources cater to various grade levels and learning styles, ensuring music education is accessible to everyone.

4.2 Popular Websites for Downloading Fun Music Worksheets

Popular websites for downloading fun music worksheets include Teachers Pay Teachers, Hoffman Academy, and Music Tech Teacher. These sites offer a variety of free and premium resources, featuring engaging activities like note-naming games, rhythm exercises, and music theory puzzles. Hoffman Academy is known for its colorful and interactive sheets, while Music Tech Teacher provides quizzes and puzzles to make learning music fun. Other notable sites include Notation Station and Music Fun products, ensuring a wide range of options for educators and parents.

Interactive and Engaging Activities

Engage students with fun music worksheets featuring color-by-note exercises, music listening journaling, and rhythm-based puzzles. These activities make learning music creative, interactive, and enjoyable for kids.

5.1 Color-by-Note and Color-by-Rhythm Exercises

Engage students with princess-themed color-by-note and color-by-rhythm exercises, combining music theory with creativity. These fun music worksheets PDFs use colorful activities to teach note recognition and rhythm patterns. Perfect for elementary levels, they make learning interactive and enjoyable while reinforcing musical concepts in an entertaining way. These exercises are professionally designed to cater to different learning stages, ensuring a fun and effective music education experience for all students.

5.2 Music Listening and Journaling Activities

Enhance music education with engaging listening and journaling activities. These fun exercises encourage students to explore different genres, identify musical elements like tempo and dynamics, and reflect on their experiences. Available as free samples, these activities are perfect for classrooms or homeschooling. They provide an interactive way to deepen musical understanding while fostering critical thinking and creativity. Ideal for various learning stages, these resources make music appreciation both educational and enjoyable for students of all ages.

5.3 Games and Puzzles for Music Learning

Engage students with fun music-themed games and puzzles that make learning exciting. Word searches, crosswords, and matching games teach music vocabulary and theory in an interactive way. These activities help students recognize notes, rhythm, and musical symbols while fostering problem-solving skills. Available as free downloads, they cater to various skill levels, ensuring a playful and effective learning experience for kids of all ages.

Curriculum Alignment and Educational Goals

Fun music worksheets PDFs align with educational goals, supporting music theory and classroom objectives. They provide structured, engaging activities that cater to diverse learning levels, ensuring effective music education.

6.1 Teaching Music Theory Through Worksheets

Fun music worksheets PDFs are effective tools for teaching music theory, offering interactive activities like note naming, rhythm exercises, and symbol recognition. These resources ensure students grasp fundamental concepts through engaging tasks, making learning enjoyable and impactful. Designed for various skill levels, they provide a structured approach to understanding music theory, fostering both creativity and knowledge retention in young learners.

6.2 Aligning Worksheets with Classroom Objectives

Fun music worksheets PDFs can be tailored to align with specific classroom objectives, ensuring targeted learning. They support curriculum standards by covering music theory, rhythm, and instrument recognition. Designed for various age groups and skill levels, these resources help teachers meet diverse learning needs. By integrating these worksheets into lesson plans, educators can create engaging, goal-oriented activities that enhance music education and student engagement.

Assessment and Progress Tracking

Fun music worksheets PDFs serve as effective tools for assessing student understanding and tracking progress in music education, ensuring engaging and measurable learning experiences for all ages.

7.1 Using Worksheets for Formative Assessment

Fun music worksheets PDFs are excellent for formative assessment, allowing teachers to monitor student progress in real-time. They provide immediate feedback, helping identify strengths and areas needing improvement. Interactive activities like color-by-note exercises and rhythm games make assessments engaging. These tools enable educators to adjust instruction dynamically, ensuring personalized learning. By incorporating themed worksheets, such as princess-themed color-by-note exercises, students stay motivated while demonstrating their understanding of music concepts. This approach fosters a positive and effective learning environment.

7.2 Tracking Student Progress in Music Education

Fun music worksheets PDFs offer a practical way to track student progress in music education. Regular use of these resources helps teachers identify improvement areas and celebrate achievements. Worksheets with activities like note naming, rhythm exercises, and themed games provide clear indicators of learning. Progress tracking sheets or digital tools can compile results, showing development over time. This structured approach ensures students stay engaged while their musical skills are accurately assessed and nurtured.

Creative and Fun Exercises

Creative exercises like princess-themed worksheets and color-by-note activities make music learning engaging. These fun, interactive resources help kids enjoy the process while mastering essential music theory concepts.

8.1 Princess-Themed and Other Themed Worksheets

Princess-themed and other creatively designed worksheets make music learning delightful for kids. These engaging resources feature colorful designs and fun activities like color-by-note and rhythm exercises. They cater to diverse interests, such as princesses, animals, or superheroes, making music education enjoyable. Themed worksheets help students connect with the material on a personal level, fostering creativity and motivation. They are perfect for young learners, blending entertainment with educational goals to create a memorable music learning experience.

8.2 Word Searches and Crossword Puzzles for Music Vocabulary

Word searches and crossword puzzles are exciting ways to teach music vocabulary. These activities engage students with terms like notes, instruments, and musical terms. They combine fun with learning, helping kids develop vocabulary while solving puzzles. Available in PDF formats, these worksheets cater to various grade levels and make music education interactive. Students enjoy the challenge while building a strong foundation in music theory and appreciation through these entertaining exercises.

Fun music worksheets PDFs are essential tools for engaging kids in music education. They foster creativity, theory understanding, and a lifelong passion for music through enjoyable activities.

9.1 The Importance of Making Music Learning Fun

Making music learning fun is crucial for engaging kids and fostering creativity. Interactive activities like color-by-note and rhythm games transform theory into enjoyable experiences, sparking curiosity and enthusiasm. These tools help students grasp musical concepts through play, building confidence and a lifelong love for music.

9.2 Encouraging a Lifelong Love for Music Through Worksheets

Fun music worksheets PDFs play a vital role in nurturing a lifelong passion for music. By blending creativity and learning, they keep kids engaged and excited. Themed worksheets, like princess-themed color-by-note activities, make music theory relatable and enjoyable. These resources help children develop essential skills while fostering a deep appreciation for music, transforming it into a cherished hobby and lifelong interest.

Posted in PDF

pocket door installation instructions pdf

A pocket door is a sliding door that disappears into a wall, saving space and offering privacy. Its installation requires precise planning and tools, ensuring smooth operation and durability.

What is a Pocket Door?

A pocket door is a sliding door that glides into a wall cavity, providing a space-saving solution for rooms. It consists of a door frame, track system, and rollers, allowing the door to disappear from view when open. This design is ideal for modern interiors, as it maximizes floor space and creates a sleek, minimalist appearance. Pocket doors are commonly used in bathrooms, closets, and living areas, offering privacy without the bulk of traditional swinging doors. Their versatility and aesthetic appeal make them a popular choice for homeowners seeking functional and stylish solutions.

Benefits of Installing a Pocket Door

Installing a pocket door offers several advantages, including space savings, improved accessibility, and aesthetic appeal. Unlike traditional swinging doors, pocket doors do not require floor space to open, making them ideal for tight areas. They provide a sleek, modern look that enhances interior design. Additionally, pocket doors can act as a sound barrier and offer privacy when closed. Their smooth operation and durability make them a practical choice for homeowners. With proper installation, pocket doors can significantly improve the functionality and visual appeal of any room, making them a worthwhile investment for modern living spaces.

Overview of the Installation Process

The installation of a pocket door involves several key steps, starting with preparing the doorway and wall structure. This includes measuring the doorway accurately and ensuring the wall can support the door’s weight. Next, the pocket door frame is assembled, and the header track is installed. The door brackets are then attached to the door and mounted onto the track. Finally, the door is hung, and adjustments are made for proper alignment and smooth operation. The process requires careful planning and attention to detail to ensure the door functions correctly and lasts for years.

Tools and Materials Needed

  • Drill and bits for precise hole drilling.
  • Screwdrivers for securing hardware.
  • Hammer for tapping parts into place.
  • Measuring tape for accurate measurements.
  • Level to ensure proper alignment.
  • Pencil for marking surfaces.
  • Header track assembly for smooth door movement.
  • Split jambs and brackets for structural support.
  • Door frame and hardware for secure installation.

Essential Tools for Installation

To ensure a successful pocket door installation, gather the necessary tools in advance. A drill with bits is required for creating pilot holes and securing components. Screwdrivers, both Phillips and flathead, are essential for tightening screws and adjusting hardware. A hammer is needed for tapping parts into place gently. A measuring tape and level are crucial for accurate measurements and proper alignment. Pencils or markers will help mark surfaces for precise cuts and placements. Additionally, a wrench or socket set may be needed for certain hardware adjustments. Having these tools ready will streamline the installation process and ensure professional results.

Required Materials for the Project

The essential materials for a pocket door installation include a pre-assembled pocket door frame, header track assembly, split jambs, and door brackets. Additionally, floor plates and split studs are necessary for proper alignment and support. A drill, screws, and wall anchors are required for securing the frame to the wall structure. For finishing, wood trim and paint or stain may be needed to blend the frame with the surrounding area. Door handles or pulls are typically sold separately, along with hinges and other hardware. Ensure all materials are compatible with your door size and weight for a secure and functional installation.

Preparation Steps

Preparation involves measuring the doorway, marking the wall for the frame, and removing packaging. Ensure the door height matches the opening and gather necessary tools.

Measuring the Doorway

Accurate measurements are crucial for a proper fit. Measure the doorway’s width and height, ensuring they match standard door sizes (24″, 30″, 32″, or 36″ wide and 80″ tall). The rough opening should equal the door’s height, typically 80″, with 1″ clearance at the top and bottom. For shorter doors, adjust the header and split studs. If the door is taller than 80″, additional framing may be needed. Measure from the finished floor or sub-floor to ensure alignment. Record these dimensions to guide frame assembly and installation, ensuring smooth operation and proper alignment of the pocket door system.

Preparing the Wall Structure

Ensure the wall is structurally sound for the pocket door. Check for plumbing, electrical wires, or studs in the installation area using a stud finder. Mark their locations to avoid damage. For standard 2×4 walls, the rough opening should be 4″ wider than the door width to accommodate the frame. If necessary, modify the wall framing by adding headers or footers. Secure any adjacent studs and ensure the floor is level. Properly preparing the wall ensures the pocket door frame fits securely, preventing future operational issues or structural damage. A well-prepared wall guarantees a smooth and durable installation.

Installation Process

Assemble the frame, install the header track, attach door brackets, and mount the door to the track. Follow manufacturer instructions for precise alignment and smooth operation.

Assembling the Pocket Door Frame

Begin by carefully unpacking the pocket door frame components. Use a screwdriver to attach the split jambs to the header track, ensuring they are securely fastened. Align the split studs with the header track and verify that all parts fit together seamlessly. Follow the manufacturer’s instructions to tighten screws properly. Make sure the frame is square and level before proceeding. If necessary, adjust the studs to accommodate the door’s height and width. Proper assembly is crucial for smooth door operation and stability.

Installing the Header Track

Position the header track above the doorway, ensuring it aligns with the wall studs. Use a level to confirm it is straight and properly aligned. Secure the track to the studs using screws provided in the kit. Tighten firmly to prevent any movement. If the track is too long, cut it to fit the doorway width using a saw. Double-check the alignment before finalizing. A properly installed header track is essential for smooth door operation and ensures the door slides effortlessly. Make sure all screws are tightened securely to avoid future adjustments.

Attaching the Door Brackets

Attach the door brackets to the top edge of the door, aligning them with the pre-drilled holes. Secure the brackets using screws from the hardware kit. Ensure they are tightly fastened to prevent movement. Next, connect the brackets to the header track, adjusting their position to achieve proper alignment. Tighten the screws firmly to secure the brackets to the track. Double-check the alignment to ensure smooth door operation. If necessary, adjust the brackets slightly for optimal performance. Properly attached brackets are crucial for the door to slide effortlessly and remain securely in place.

Mounting the Door to the Track

To mount the door to the track, align the door brackets with the header track, ensuring proper positioning. Carefully lift the door and attach the brackets to the track using the provided screws. Tighten the screws firmly to secure the door in place. Test the door by sliding it back and forth to ensure smooth operation. If necessary, adjust the brackets for proper alignment and movement. Make sure the door is level and plumb for optimal performance. Double-check all connections to ensure they are secure and functioning correctly. Proper mounting ensures the door slides effortlessly and remains stable.

Finishing Touches

Trim excess materials, paint or finish the frame to match the surrounding area, and install handles or pulls securely. Ensure all components are tightly fastened for durability.

Trimming and Painting the Frame

Once the pocket door is installed, trim any excess material from the frame for a seamless look. Sand the edges to ensure smoothness before painting or staining. Apply primer if necessary to achieve an even finish. Paint or stain the frame to match the surrounding decor, allowing each coat to dry completely. Avoid painting over hardware or tracks to maintain functionality. Proper finishing enhances the door’s appearance and ensures long-lasting durability. Follow manufacturer guidelines for paint and stain application to achieve optimal results.

Installing Door Handles or Pulls

Choose a handle or pull that complements your door’s style and functionality. Measure the door’s thickness and mark the handle’s placement, ensuring it aligns with the door’s center. Drill pilot holes if necessary, then screw the handle or pull into place. Test the handle to ensure it operates smoothly and securely. For recessed pulls, follow the manufacturer’s instructions to avoid damaging the door. Ensure the handle doesn’t interfere with the door’s sliding mechanism. A properly installed handle enhances accessibility and completes the door’s aesthetic.

Safety Considerations

  • Always use safety goggles and gloves when handling power tools.
  • Lift heavy materials carefully to avoid muscle strain.
  • Ensure the work area is clear of debris to prevent accidents.

Working with Power Tools Safely

When using power tools for pocket door installation, always wear safety goggles and gloves to protect against debris and electrical hazards. Ensure tools are well-maintained and properly grounded. Avoid wearing loose clothing that could get caught in machinery. Keep long hair tied back and avoid distractions while operating tools. Use the correct tool for each task to prevent accidents. Never overload drills or saws, as this can cause malfunctions. Store tools in a dry, secure location after use. Always follow the manufacturer’s safety guidelines and unplug tools when not in use to minimize risks.

Proper Lifting Techniques

Lifting heavy materials during pocket door installation requires careful attention to safety. Always assess the weight of components like the door or frame before lifting. Work in pairs or teams to share the load, especially for larger or heavier items; Bend at the knees, keep your back straight, and lift with leg strength to avoid strain. Hold the load close to your body and avoid twisting. If the item is too heavy, consider using mechanical aids like dollies or pulleys. Never lift beyond your capacity to prevent injuries and ensure a secure installation process.

Troubleshooting Common Issues

Common issues include door misalignment, track obstructions, and hardware malfunctions. Check the track for debris, ensure proper alignment, and verify all connections are secure for smooth operation.

Aligning the Door Properly

Proper alignment is crucial for smooth pocket door operation. Ensure the track is level and securely fastened to the header. Measure and mark the door’s position accurately, verifying it is centered within the doorway. Adjust the door brackets to align with the track, ensuring proper clearance. Check the door’s height, making sure it is even with the floor and the top of the frame. If the door sags or binds, loosen the brackets and reposition them slightly. Test the door by sliding it back and forth to confirm smooth movement and proper alignment.

Adjusting the Track for Smooth Operation

Ensure the track is level and securely anchored to the header for smooth operation. Tighten all bolts and screws firmly but avoid over-tightening. Lubricate the rollers with silicone spray to reduce friction. If the door binds, adjust the brackets by loosening the screws slightly, then reposition the door and retighten. Check the alignment of the track and brackets, making sure they are parallel. Test the door’s movement by sliding it multiple times. If it still doesn’t glide smoothly, inspect for obstructions or uneven surfaces and make necessary adjustments to achieve seamless operation.

With careful planning and execution, a pocket door installation can enhance your space by saving room and adding a modern touch. Always follow manufacturer instructions and double-check measurements for a seamless fit. Regularly inspect and maintain the track and rollers to ensure smooth operation. Address any alignment issues promptly to prevent damage. By troubleshooting common problems and adjusting components as needed, you can enjoy a functional and stylish pocket door system for years to come. Proper installation and maintenance will ensure safety and durability, making your effort worthwhile in the end.

craftsman rear tine tiller manual

Welcome to the Craftsman Rear Tine Tiller Manual. This guide provides essential information for the safe operation, assembly, and maintenance of your tiller. It ensures effective use and troubleshooting, helping you achieve optimal performance and longevity. Read carefully to get the most out of your equipment.

Overview of the Manual’s Purpose and Content

This manual is designed to guide users through the safe and effective use of the Craftsman Rear Tine Tiller. It covers essential topics such as assembly, operation, maintenance, and troubleshooting. The manual also includes detailed instructions for starting and stopping the engine, tilling techniques, and regular maintenance tasks; Additionally, it provides information on warranty coverage and how to contact customer support. By following the guidelines in this manual, users can ensure optimal performance, longevity, and safety while operating the tiller. This comprehensive resource is indispensable for both new and experienced users;

Importance of Reading the Manual for Safe and Effective Use

Reading the Craftsman Rear Tine Tiller Manual is crucial for ensuring safe and effective operation. It provides detailed safety precautions, operational guidelines, and maintenance tips to prevent accidents and prolong the tiller’s lifespan. Understanding the controls and proper usage techniques is essential for achieving optimal performance. Additionally, the manual outlines warranty terms and troubleshooting steps, helping users address issues efficiently. By following the manual, users can minimize risks, maintain their equipment, and enjoy reliable service for years to come. It is a vital resource for both novice and experienced operators.

Safety Precautions and Guidelines

Always wear protective gear, ensure the area is clear of debris, and follow safety guidelines to prevent accidents. Be mindful of surroundings while operating the tiller.

General Safety Tips for Operating the Rear Tine Tiller

Always wear protective gear such as gloves and safety glasses to minimize injury risks. Ensure the area is clear of obstacles and debris before starting the tiller. Be aware of your surroundings to avoid accidents, especially when the tines are moving. Properly handle the tiller, maintaining a firm grip to control its movement. Follow all safety guidelines outlined in the manual for optimal safe operation. Regular maintenance checks are vital to ensure the tiller functions correctly and safely.

Specific Hazards and Precautions to Avoid Accidents

Be cautious of the counter-rotating tines, as they can cause severe injury if not handled properly. Keep loose clothing and long hair tied back to avoid entanglement. Never allow children or pets near the tiller while it’s in operation. Ensure the tiller is properly maintained to prevent mechanical failures. Avoid using the tiller in wet conditions, as this can lead to slipping or electrical hazards. Always turn off the engine and wait for the tines to stop before leaving the machine unattended or performing maintenance.

Assembly and Initial Setup

Craftsman Rear Tine Tiller assembly requires careful attention to detail. Follow the manual’s step-by-step guide to ensure all parts are properly aligned and securely tightened. Double-check each component for damage before use to ensure safety and functionality.

Step-by-Step Assembly Instructions

Begin by carefully unboxing and inventorying all parts. Attach the handlebars securely using the provided bolts. Next, assemble the tine mechanism, ensuring proper alignment with the axle. Install the tires and tighten the lug nuts firmly. Connect the engine controls to the mainframe, following the wiring diagram. Finally, fill the oil reservoir and check fluid levels. Refer to the diagrams in the manual for precise alignment and tightening specifications. If any part is missing or damaged, contact customer support before proceeding.

Initial Maintenance Checks Before First Use

Before starting your Craftsman Rear Tine Tiller, perform essential checks. Ensure the oil level is adequate and the tires are inflated to the recommended pressure. Inspect all bolts and connections for tightness. Verify that the tines are properly aligned and free of obstructions. Check the control cables and levers for smooth operation. Refer to the manual for specific fluid requirements and torque specifications. Address any issues before use to ensure safety and optimal performance. If unsure, consult the troubleshooting section or contact support.

Operating the Rear Tine Tiller

Start the engine following the manual’s instructions and adjust the tine depth for optimal soil preparation. Use steady, controlled movements to ensure even tilling and avoid overworking the soil. Always maintain a firm grip on the handles and keep the tiller at a consistent speed for best results. Refer to the manual for specific techniques and guidelines to maximize efficiency and prevent damage to the machine.

Starting and Stopping the Engine

To start the engine, ensure the tiller is on level ground and disengage the tines. Set the choke to the “start” position, prime the engine if necessary, and pull the starter cord firmly. Once running, gradually release the choke; For stopping, allow the engine to cool slightly before turning it off. Always wear protective gear and ensure the area is clear of debris. Refer to the manual for specific starting and stopping procedures to ensure safe and efficient operation. Regular maintenance, as outlined, will help maintain engine performance and warranty validity.

Tilling Techniques for Optimal Performance

For optimal performance, start by adjusting the tine depth based on soil conditions. Maintain a steady walking pace to ensure consistent tilling. Overlap passes slightly to cover the entire area evenly. Work in the same direction to avoid pulling dirt back over freshly tilled soil. For hard or rocky ground, reduce the tine depth and proceed slowly. Regularly clean debris from the tines to prevent clogging. These techniques will help you achieve a well-prepared soil bed for planting, ensuring efficient and effective tilling with your Craftsman Rear Tine Tiller.

Maintenance and Troubleshooting

Regularly inspect and clean the tines, ensuring they are free from debris. Lubricate moving parts as specified to maintain smooth operation. Address issues like bent tines or engine problems promptly to prevent further damage. Refer to the manual for troubleshooting common issues and follow maintenance schedules to ensure longevity and performance. Proper care extends the life of your Craftsman Rear Tine Tiller and ensures reliable operation.

Regular Maintenance Tasks for Longevity

To ensure your Craftsman Rear Tine Tiller performs optimally, regular maintenance is crucial. Lubricate all moving parts, including the gearbox and pivot points, as specified in the manual. Inspect and clean the tines after each use to prevent rust and debris buildup. Check the oil level and change it as recommended to keep the engine running smoothly. Sharpen the tines periodically to maintain tilling efficiency. Additionally, inspect the belts and cables for wear and tear, replacing them if necessary. By following these steps, you can extend the life of your tiller and ensure consistent performance.

Common Issues and Troubleshooting Solutions

Common issues with the Craftsman Rear Tine Tiller include bent crankshafts due to operator negligence or hitting hard objects. To avoid this, ensure proper maintenance and avoid overloading. If the tiller doesn’t start, check for old fuel or a clogged fuel line. Replace the spark plug if necessary. For tines clogging with debris, clean them regularly and lubricate moving parts. Refer to the manual for specific repair instructions and warranty coverage, as improper maintenance may void the warranty. Addressing these issues promptly ensures optimal performance and longevity of the tiller.

Warranty and Support Information

The Craftsman Rear Tine Tiller is backed by a limited two-year warranty covering defects in material and workmanship. For support, contact Sears or visit authorized service centers.

Understanding the Warranty Coverage

The Craftsman Rear Tine Tiller is protected by a limited two-year warranty, covering defects in material and workmanship. This warranty applies for two years from the purchase date. Proper maintenance and adherence to manual instructions are required to maintain warranty validity. Repairs due to negligence, improper maintenance, or commercial use are excluded. Warranty coverage ensures free repairs for eligible issues, providing peace of mind for owners. Always refer to the manual for full warranty terms and conditions.

Contacting Customer Support and Service Centers

For assistance, refer to the manual for customer support contact details. Craftsman provides dedicated service centers for repairs and maintenance. Reach out via phone, email, or online chat for inquiries. Authorized service centers offer genuine parts and expert help. Visit the official website for a list of nearby centers. Ensure to use verified support channels to avoid unauthorized services. This ensures your tiller receives proper care, maintaining its performance and warranty coverage. Contacting support early helps resolve issues promptly and effectively.

For effective use of the Craftsman Rear Tine Tiller, always read the manual thoroughly. Ensure proper assembly, follow safety guidelines, and perform regular maintenance. Understand engine start-up and tilling techniques for optimal performance. Address common issues promptly using troubleshooting solutions. Maintain the tiller as instructed to extend its lifespan. Familiarize yourself with warranty details for support. By adhering to these key points, you’ll enjoy safe, efficient, and reliable operation of your tiller, achieving the best results for your gardening needs.

Final Tips for Maximizing Tiller Performance

Maximize your Craftsman Rear Tine Tiller performance by adhering to maintenance schedules and using the correct tilling techniques. Regularly inspect and sharpen tines for efficient soil preparation. Adjust tine depth based on soil conditions and work in consistent passes for uniform results. Store the tiller in a dry, protected area to prevent damage. Follow the manual’s lubrication and tuning guidelines to ensure smooth operation. Address repairs promptly to avoid performance drop. By following these tips, you’ll achieve optimal soil preparation and extend the tiller’s lifespan for years of reliable service.

plt legend bluetooth manual

Welcome to the PLT Legend Bluetooth Manual, your comprehensive guide to setting up and using the Poly Voyager Legend Wireless Headset. This manual provides detailed instructions for pairing, troubleshooting, and optimizing your Bluetooth experience.

Overview of the PLT Legend Bluetooth Headset

The PLT Legend Bluetooth Headset, also known as the Poly Voyager Legend, is a wireless Bluetooth headset designed for professional use. It features noise-cancellation technology, voice controls, and a single-ear design for comfort and convenience. The headset supports Bluetooth connectivity, allowing users to pair it with multiple devices such as phones, tablets, and computers. With its advanced microphone and intuitive controls, the PLT Legend is ideal for hands-free calls and multimedia applications. Its sleek design and lightweight construction make it a popular choice for both office and on-the-go use, ensuring a seamless and high-quality audio experience.

Importance of the User Manual for Proper Setup and Usage

Importance of the User Manual for Proper Setup and Usage

The user manual plays a crucial role in ensuring the proper setup and usage of the PLT Legend Bluetooth Headset. It provides step-by-step instructions for pairing the device, troubleshooting common issues, and optimizing features like noise-cancellation and voice controls. Without the manual, users may struggle to fully utilize the headset’s capabilities, such as connecting to multiple devices or customizing settings. The guide also includes safety precautions and maintenance tips, ensuring a safe and efficient experience. Referencing the manual helps users avoid potential setup errors and guarantees optimal performance of the headset.

Key Features of the PLT Legend Bluetooth Headset

Key Features of the PLT Legend Bluetooth Headset

The PLT Legend Bluetooth Headset offers advanced features designed for seamless communication. It includes noise-cancellation technology to block background noise, ensuring clear audio quality. The headset also features voice controls for hands-free operation and intuitive volume management. With Bluetooth connectivity, it supports pairing with multiple devices, making it versatile for professional and personal use. The single-ear design provides comfort and convenience, while the built-in microphone enhances call clarity. These features make the PLT Legend an ideal choice for users seeking a reliable and high-performance Bluetooth headset.

Key Features and Technical Specifications

The PLT Legend Bluetooth Headset boasts advanced noise-cancellation, Bluetooth connectivity, and voice controls. It features a lightweight, single-ear design with a built-in microphone for enhanced call clarity and convenience.

Design and Build Quality of the Headset

Design and Build Quality of the Headset

The PLT Legend Bluetooth Headset features a sleek, ergonomic design tailored for comfort and durability. Constructed with premium materials, it ensures a secure fit and long-lasting performance. The single-ear design allows for easy on-ear placement, while the lightweight frame minimizes fatigue during extended use. Its robust build quality withstands daily wear and tear, making it ideal for both professional and casual settings. The headset’s compact form factor and intuitive controls enhance user experience, providing seamless functionality and style.

Bluetooth Connectivity and Range

Bluetooth Connectivity and Range

The PLT Legend Bluetooth Headset offers reliable wireless connectivity with a range of up to 98 feet, ensuring stable performance even at a distance. Equipped with advanced Bluetooth technology, it supports seamless connections to smartphones, tablets, and computers. The headset automatically pairs with devices, providing a hassle-free experience. Its robust signal strength minimizes dropouts, delivering uninterrupted audio. Whether in a busy office or on the go, the PLT Legend maintains a strong, consistent connection, enhancing productivity and entertainment. The Bluetooth range and compatibility ensure reliable performance across various environments.

Noise-Cancellation Technology

Noise-Cancellation Technology

The PLT Legend Bluetooth Headset features advanced noise-cancellation technology, designed to minimize background noise and enhance audio clarity. With dual microphones and DSP, it effectively isolates your voice during calls, ensuring clear communication in noisy environments. The noise-cancellation system operates in both transmit and receive modes, reducing ambient sounds and delivering crisp, distortion-free audio. This technology is particularly beneficial for professionals in busy offices or outdoor settings, providing a more immersive listening experience and improving call quality. The headset’s noise-cancellation capabilities make it an ideal choice for users seeking uninterrupted audio performance in challenging acoustic conditions.

Voice Controls and Volume Management

Voice Controls and Volume Management

The PLT Legend Bluetooth Headset offers intuitive voice controls and seamless volume management for a personalized experience. With voice commands, you can effortlessly answer or reject calls, ensuring hands-free convenience. The headset features dedicated volume buttons, allowing you to adjust sound levels with precision. Additionally, a mute function provides instant control over call audio, enhancing privacy and flexibility. These features are compatible with a wide range of devices, ensuring consistent performance. The manual provides detailed guidance on customizing voice and volume settings to suit your preferences, making it easy to optimize your communication experience.

User Manual Guide

The PLT Legend Bluetooth Manual serves as your comprehensive resource for setup, usage, and troubleshooting. It includes a table of contents, system requirements, and safety guidelines.

Table of Contents and Navigation

Table of Contents and Navigation

The PLT Legend Bluetooth Manual begins with a detailed table of contents, ensuring easy navigation through sections like setup, pairing, troubleshooting, and safety guidelines. Each chapter is clearly labeled, allowing users to quickly locate specific information. The manual is structured to guide users from initial unboxing to advanced features, ensuring a seamless experience. Topics include product overview, technical specifications, and user interface controls. This organized approach helps users efficiently find the information they need, making the manual an indispensable resource for maximizing the headset’s functionality and performance. The table of contents is your roadmap to mastering the PLT Legend Bluetooth Headset.

System Requirements for Optimal Performance

System Requirements for Optimal Performance

For the PLT Legend Bluetooth Headset to function optimally, ensure your device meets specific system requirements. The headset is compatible with Bluetooth 4.0 or higher, supporting a wide range of smartphones, tablets, and PCs. It works seamlessly with Android and iOS devices, as well as Windows and macOS operating systems. Ensure your device has the latest Bluetooth drivers and software updates installed. The headset also supports dual-device connectivity, allowing simultaneous pairing with two devices. Properly charge the headset before use and maintain a stable Bluetooth connection within the recommended range of up to 33 feet. Refer to the manual for detailed compatibility and setup instructions to ensure uninterrupted performance and full feature functionality.

What’s in the Box: Accessories and Components

The PLT Legend Bluetooth Headset package includes the headset itself, a USB adapter for PC connectivity, a charging cable, and three sizes of ear tips for a comfortable fit. Additionally, you’ll find a carrying pouch for convenient storage and transport. The box also contains a user manual and a safety guide, ensuring you have all the information needed to set up and use your device properly. These accessories provide everything necessary for a seamless and enjoyable experience with your PLT Legend Bluetooth Headset.

Safety Precautions and Guidelines

Ensure safe usage of your PLT Legend Bluetooth Headset by following these guidelines. Avoid using the headset in hazardous environments where audio distractions could pose risks. Keep the device away from extreme temperatures, moisture, and physical stress. Prevent damage by avoiding improper handling or dropping the headset. Use the provided ear tips correctly to maintain comfort and hygiene. Avoid exposing the headset to direct sunlight or high humidity for extended periods. For optimal performance and longevity, adhere to these precautions and store the device in its carrying pouch when not in use.

Pairing and Connectivity

Pair your PLT Legend Bluetooth Headset by holding the Bluetooth button until LEDs flash. Connect via device settings and select ‘PLT_Legend.’ For issues, restart and retry pairing.

Pairing the Headset with Your Device

Pairing the Headset with Your Device

To pair the PLT Legend Bluetooth headset with your device, ensure it is turned off. Press and hold the Bluetooth button until the LED lights flash red and blue alternately. Activate Bluetooth on your device and search for available devices. Select “PLT_Legend” from the list. If prompted, confirm the pairing by entering the default PIN code, typically “0000” or “1234.” Once connected, the LED lights will stop flashing, indicating successful pairing. This process ensures a secure and stable connection for optimal audio performance.

Connecting to Multiple Devices

Connecting to Multiple Devices

The PLT Legend Bluetooth headset supports connectivity to multiple devices, enhancing versatility for users. To connect to another device, ensure the headset is in pairing mode by holding the Bluetooth button until the LED flashes red and blue. Activate Bluetooth on the second device and select “PLT_Legend” from the available options. The headset can store up to eight devices and maintain two active connections simultaneously. This feature allows seamless switching between calls, music, or other audio sources across different devices, ensuring uninterrupted productivity and entertainment. Follow the same pairing process for additional devices, up to the maximum capacity.

Troubleshooting Pairing Issues

Troubleshooting Pairing Issues

If pairing issues arise with your PLT Legend Bluetooth headset, restart both the headset and your device. Ensure Bluetooth is enabled and the headset is in pairing mode (LED flashing red and blue); If already connected to another device, disconnect it before pairing a new one. Verify device compatibility and ensure no interference from nearby Bluetooth devices. If issues persist, reset the headset by holding the volume down and call buttons for 10 seconds. This restores factory settings. For unresolved problems, refer to the troubleshooting section in the user manual or contact support for further assistance.

User Interface and Controls

The PLT Legend Bluetooth headset features an intuitive interface with volume and call control buttons, allowing easy management of voice commands and audio settings.

Understanding the Buttons and Indicators

Understanding the Buttons and Indicators

The PLT Legend Bluetooth headset features a sleek design with intuitive buttons for managing calls, volume, and voice commands. The power button doubles as the pairing button, while the volume controls allow for easy audio adjustment. The LED indicators provide visual feedback for pairing status, battery life, and active calls. A flashing blue light indicates pairing mode, while a steady light confirms a successful connection. The noise-canceling microphone ensures clear voice transmission, and the mute button provides quick access to silence your microphone during calls. These controls make it easy to navigate and customize your Bluetooth experience seamlessly.

Customizing Settings for Personal Preference

The PLT Legend Bluetooth headset allows users to tailor their experience through customizable settings. Adjust voice controls to suit your preferences, such as activating voice commands or disabling auto-answer. Volume management can be fine-tuned for optimal audio quality, and noise-canceling settings can be optimized for different environments. Additionally, users can customize the LED indicator behaviors and assign functions to specific buttons for easier access. These personalization options ensure a seamless and tailored experience, enabling you to maximize the headset’s functionality according to your needs and preferences. This level of customization enhances usability and ensures a more intuitive interaction with the device.

Battery and Charging

The PLT Legend Bluetooth Headset delivers reliable battery life with easy charging options, ensuring uninterrupted listening and talk time effortlessly throughout your entire day.

Charging the Headset

Charging the Headset

To charge the PLT Legend Bluetooth Headset, connect it to a USB port using the provided cable. The headset typically takes 1-2 hours to fully charge. An LED indicator will show a red light during charging and turn blue once fully charged. Ensure the headset is turned off while charging for optimal battery performance. The headset can be used while charging, though it’s recommended to let it charge completely for the best experience. Always use the original charger to maintain battery health and avoid overcharging, which can affect longevity.

Battery Life and Usage Expectations

Battery Life and Usage Expectations

The PLT Legend Bluetooth Headset offers impressive battery life, delivering up to 24 hours of talk time and an extended standby time of several days. The headset provides clear audio performance even with prolonged use. Charging is efficient, with a full charge achieved in about 1.5 hours. To maximize battery life, avoid overcharging and store the headset in a cool, dry place when not in use. The battery indicator ensures you stay informed about remaining power, while voice prompts notify you when it’s time to recharge. Proper care extends the lifespan of the battery, ensuring reliable performance over time.

abo study guide

The ABO Study Guide is a comprehensive resource designed to help opticians prepare for the certification exam. It covers key topics such as eye anatomy, refractive errors, optical principles, and patient care. With detailed explanations and practice questions, it ensures a thorough understanding of essential concepts, aiding in both theoretical and practical knowledge development.

1.1 Overview of the ABO Exam

The ABO exam assesses knowledge and skills in opticianry, covering eye anatomy, refractive errors, optical principles, and patient care. It includes multiple-choice questions testing theoretical understanding and practical application. The exam is designed to ensure opticians can interpret prescriptions, understand lens design, and apply optical concepts effectively. Passing the ABO exam demonstrates professional competence in delivering quality eyecare services.

1.2 Importance of the ABO Certification

ABO certification is a mark of professional excellence in opticianry, demonstrating a strong understanding of optical principles and patient care. It enhances credibility, career prospects, and the ability to provide quality eyecare services. Certified opticians are better equipped to interpret prescriptions, understand lens design, and apply optical concepts effectively, ensuring they meet industry standards and deliver exceptional patient outcomes.

Eye Anatomy and Physiology

This section introduces the structure and functions of the eye, focusing on key components like the cornea, lens, retina, and optic nerve, essential for understanding opticianry.

2.1 Structure of the Eye

The eye is a complex organ with layered structures, including the cornea, lens, retina, macula, optic nerve, sclera, choroid, iris, and ciliary body. These components work together to focus light, protect the eye, and enable vision. The cornea and lens refract light onto the retina, while the iris controls light entry, and the ciliary body adjusts lens shape for accommodation, ensuring clear sight at varying distances.

2.2 Functions of Key Eye Components

The cornea refracts light, while the lens focuses it onto the retina. The retina converts light into signals, transmitted by the optic nerve to the brain. The iris regulates light entry, and the ciliary muscles adjust lens shape for accommodation. The macula enables sharp central vision, and the choroid supplies blood to the retina, ensuring proper function and clarity in vision across varying light conditions and distances.

Refractive Errors and Corrections

Refractive errors, such as myopia, hyperopia, astigmatism, and presbyopia, occur when light doesn’t focus correctly on the retina. Corrections include glasses, contact lenses, or refractive surgery to restore clear vision.

3.1 Types of Refractive Errors

Refractive errors include myopia (nearsightedness), hyperopia (farsightedness), astigmatism, and presbyopia. Myopia occurs when light focuses in front of the retina due to a long eyeball or steep cornea. Hyperopia is the opposite, with light focusing behind the retina, often from a short eyeball or flat cornea. Astigmatism results from an irregular cornea shape, causing blurred vision at all distances. Presbyopia, age-related, affects near vision due to reduced lens flexibility.

3.2 Corrective Lenses and Their Applications

Corrective lenses address refractive errors by refracting light properly onto the retina. Single vision lenses correct myopia, hyperopia, or astigmatism in one focal length. Bifocal lenses combine two prescriptions for near and far vision, while progressive lenses offer a smooth transition. Aspheric lenses reduce thickness for high prescriptions. Anti-reflective coatings minimize glare, and blue light protection supports digital device users. Proper lens selection enhances clarity and comfort for specific vision needs.

Optical Principles and Concepts

Optical principles include reflection, refraction, and Snell’s Law, which explain how light interacts with surfaces and mediums. Understanding these concepts is crucial for lens power calculations and prescriptions.

4.1 Reflection and Refraction in Optics

Reflection and refraction are fundamental optical principles. Reflection occurs when light bounces off a surface, while refraction involves light bending as it passes through different mediums. Understanding these phenomena is essential for calculating lens power and designing corrective eyewear. Snell’s Law, which relates the angles of incidence and refraction, is a key concept in opticianry, aiding in precise lens prescriptions and troubleshooting optical issues.

4.2 Understanding Lens Power and Prescription

Lens power, measured in diopters, determines how strongly it focuses light. Prescriptions include sphere, cylinder, axis, and add power. Sphere corrects nearsightedness or farsightedness, while cylinder and axis address astigmatism. Add power compensates for presbyopia. Accurate interpretation ensures proper lens fabrication, making it crucial for opticians to understand these elements to provide correct vision correction and meet patient needs effectively.

Lens Design and Measurements

Lens design and measurements are critical for creating precise optical corrections. Modern techniques ensure accuracy, from single vision to progressive lenses, meeting specific patient needs effectively.

5.1 Single Vision, Bifocal, and Progressive Lenses

Single vision lenses correct one prescription, ideal for distance or near tasks. Bifocal lenses feature two segments for distance and near vision. Progressive lenses offer a smooth transition between multiple prescriptions, eliminating visible lines. Each design addresses specific vision needs, with progressives being the most advanced for presbyopia. Understanding these differences is essential for opticians to recommend the right lens type for patient lifestyles and preferences.

5.2 Measuring and Fitting Lenses

Measuring and fitting lenses require precision to ensure optimal vision correction. Using tools like a distometer and lens ruler, opticians verify prescription accuracy. Proper fitting involves aligning the lens with the pupil and ensuring frame comfort. Understanding monocular PD and vertex distance is crucial for accurate measurements. This process ensures lenses are tailored to individual needs, enhancing both functionality and patient satisfaction.

Prescription Interpretation

Prescription interpretation is a critical skill for opticians, involving the accurate reading and understanding of lens prescriptions, including sphere, cylinder, axis, and add power, ensuring precise vision correction.

6.1 Reading and Interpreting Lens Prescriptions

Reading and interpreting lens prescriptions involves understanding key components like sphere, cylinder, axis, and add power. The cylinder indicates astigmatism correction, while the axis specifies the lens orientation. A minus cylinder corrects nearsightedness, and a plus cylinder corrects farsightedness. Accurate interpretation ensures proper lens alignment and vision correction. Practicing with sample prescriptions and understanding the impact of axis adjustments enhances precision in meeting patient needs effectively.

6.2 Calculating Cylinder Power and Axis

Calculating cylinder power and axis involves determining the correct lens orientation for astigmatism correction. The axis indicates the degree (0-180) where the cylinder power is applied. Moving 90 degrees from the specified axis changes the cylinder’s effect. For example, at 090 degrees, a -4.25 power adjusts to -3.75 with an additional -0.50, resulting in -3.75 -0.50 × 045. Precision in calculations ensures accurate lens alignment and clear vision correction.

Patient Care and Communication

Patient care and communication are essential in opticianry, focusing on understanding patient needs, effective dialogue, and empathy to ensure personalized solutions and trust-building interactions.

7.1 Assessing Patient Needs

Assessing patient needs involves understanding their visual challenges, lifestyle, and preferences through effective communication and observation. This includes using questionnaires, surveys, and physical assessments to gather detailed information. Active listening and open-ended questions help identify specific requirements, while considering factors like occupation and hobbies ensures tailored solutions. Addressing both visual and non-visual needs fosters trust and leads to personalized care and satisfaction.

7.2 Effective Communication Techniques

Effective communication involves active listening, clear explanations, and empathy to ensure patient understanding. Using simple, jargon-free language and non-verbal cues like eye contact enhances trust. Summarizing key points and asking open-ended questions helps clarify needs. Tailoring communication to individual preferences fosters a positive experience, ensuring patients feel heard and confident in their care decisions. Regular feedback ensures understanding and builds a strong optician-patient relationship.

Optical Materials and Coatings

CR-39 lenses reflect approximately 4% of light, while anti-reflective and blue light coatings reduce glare and harmful rays, improving vision clarity and reducing eye strain. These coatings also enhance lens durability and maintain optical clarity, ensuring optimal performance and patient satisfaction.

8.1 Types of Lens Materials

Common lens materials include CR-39, polycarbonate, Trivex, high-index, and glass. CR-39 is lightweight and impact-resistant, ideal for everyday use. Polycarbonate and Trivex offer superior impact resistance, perfect for safety and sports eyewear. High-index lenses are thinner and suitable for strong prescriptions, while glass provides excellent optical clarity but is heavier. Each material balances durability, weight, and optical performance for specific needs.

8.2 Anti-Reflective and Blue Light Coatings

Anti-reflective coatings minimize glare and reflections, enhancing light transmission and reducing eye strain. Blue light coatings block harmful screen emissions, protecting eyes from digital fatigue. These coatings are essential for modern lifestyles, offering comfort and visual clarity in environments with prolonged screen exposure, while maintaining lens aesthetics and functionality for optimal wearer satisfaction and long-term eye health benefits.

ABO Practice Questions and Exam Tips

This section provides sample questions and detailed answers to simulate real exam conditions. It also offers strategies for time management, accuracy, and reducing exam-day anxiety, ensuring confidence.

9.1 Sample Questions and Answers

This section features a variety of sample questions mirroring the actual ABO exam format. Each question is paired with a detailed answer, explaining the reasoning behind the correct choice. Topics range from calculating cylinder power to understanding refractive errors. The questions are designed to test theoretical knowledge and practical application, ensuring thorough preparation for the certification exam. Regular practice with these questions enhances problem-solving skills and exam readiness.

9.2 Strategies for Success on Exam Day

To excel on the ABO exam, arrive early and stay calm. Allocate time wisely, answering easier questions first. Read each question carefully, identifying key terms. Eliminate incorrect options before guessing. Use the provided calculators and tools effectively. Review answers if time permits. Stay focused and maintain confidence throughout the exam. Proper preparation and a strategic approach will enhance your performance and ensure success.

Additional Study Resources

The ABO Study Guide, along with OpticianWorks resources and ABO practice questions, provides comprehensive materials. Utilize online platforms like Quizlet for interactive learning and exam preparation.

10.1 Recommended Study Guides and Tools

The Laramy-K Optician Works Ultimate ABO Study Guide, a free 83-page resource, is highly recommended for comprehensive exam preparation. It covers essential topics and practical examples. Additionally, flashcards on platforms like Quizlet can enhance memorization of key terms and concepts. Utilize these tools to reinforce learning and ensure a strong foundation for success on the ABO exam.

10.2 Online Platforms for Practice

Online platforms like Quizlet offer interactive flashcards to memorize key terms and concepts. Additionally, websites providing ABO practice questions with detailed answers are invaluable for exam preparation. Tools like Twee AI can generate practice worksheets and quizzes, while official ABO resources provide realistic exam simulations to test knowledge and readiness.

Mastery of the ABO exam requires consistent study and practice. This guide offers comprehensive coverage, ensuring you’re thoroughly prepared to succeed as an optician now.

11.1 Final Tips for Mastering the ABO Exam

Consistent practice and thorough review are key. Use flashcards for quick concept recall and study guides for in-depth understanding. Set a study schedule, simulate exam conditions, and focus on weak areas. Stay calm during the test and carefully read each question. Reviewing past mistakes will help solidify your knowledge and ensure success on exam day.

verdant vx thermostat manual

The Verdant VX Thermostat is an advanced, energy-efficient solution designed to optimize heating and cooling systems․ It offers smart features, remote control, and detailed energy usage insights․

Overview of the Verdant VX Thermostat

The Verdant VX Thermostat is a smart, Wi-Fi-enabled device designed to enhance home comfort and energy efficiency․ It offers intuitive controls and seamless integration with HVAC systems, allowing users to manage temperature settings effortlessly․ With its sleek, modern design, the thermostat is both functional and visually appealing․ It supports remote access via a mobile app, enabling users to adjust settings on the go․ The device also incorporates advanced features like geofencing and smart learning technology to optimize heating and cooling based on occupancy and preferences․ This makes it an ideal choice for homeowners seeking convenience and energy savings․

Key Benefits of Using the Verdant VX Thermostat

Using the Verdant VX Thermostat offers numerous advantages, including enhanced energy efficiency, remote temperature control, and smart learning capabilities․ It optimizes heating and cooling based on usage patterns, reducing energy waste․ The thermostat’s geofencing feature adjusts settings based on your location, ensuring comfort upon arrival․ Additionally, detailed energy reports provide insights to help lower utility bills․ Its user-friendly interface and compatibility with various HVAC systems make it a versatile and practical solution for modern homes, promoting both convenience and cost savings․

Features and Capabilities

The Verdant VX Thermostat boasts smart learning technology, energy usage reporting, and remote access․ It integrates with home systems, offering geofencing and voice control compatibility for seamless operation․

Smart Learning Technology

The Verdant VX Thermostat features advanced smart learning technology that adapts to your temperature preferences over time․ It learns your daily routines and adjusts settings automatically, ensuring optimal comfort while saving energy․ This intelligent system can detect when you’re away or asleep and modifies temperatures accordingly․ With geofencing integration, it knows when you’re approaching home and pre-conditions the space․ The thermostat also analyzes energy usage patterns to provide personalized recommendations, enhancing efficiency without compromising comfort․ This technology ensures a seamless and intuitive user experience․

Energy Usage Reporting

The Verdant VX Thermostat provides detailed energy usage reports, offering insights into your heating and cooling consumption․ These reports highlight daily, weekly, and monthly energy use, helping you identify trends and areas for improvement․ The system tracks when the thermostat is in heating, cooling, or off modes, providing a clear breakdown of energy expenditure․ Accessible via the app, these reports empower you to make informed decisions to reduce energy waste and lower utility bills․ Customizable alerts notify you of unusual usage patterns, ensuring optimal energy management․

Remote Access and Control

The Verdant VX Thermostat offers seamless remote access and control through its intuitive mobile app․ Users can adjust temperature settings, monitor system activity, and receive notifications from anywhere․ Compatible with both iOS and Android devices, the app ensures convenience and flexibility․ Remote control allows for effortless scheduling, geofencing, and energy management․ This feature is particularly useful for optimizing comfort and energy efficiency, even when you’re not at home․ Stay connected to your thermostat and maintain control over your environment with just a few taps on your smartphone․

Installation and Setup

The Verdant VX Thermostat installation process is straightforward, requiring compatibility with existing HVAC systems․ Ensure proper wiring and follow manual instructions for a smooth setup experience․

Step-by-Step Installation Guide

To install the Verdant VX Thermostat, start by turning off power to your HVAC system at the circuit breaker․ Remove the old thermostat and label the wires for identification․ Mount the new base plate using screws provided․ Connect the wires to the appropriate terminals as per the manual․ Install the thermostat faceplate and ensure all connections are secure․ Turn the power back on and follow the on-screen setup instructions to configure basic settings and connect to Wi-Fi for smart features․

Initial Setup and Configuration

After installation, power on the thermostat and follow the on-screen prompts․ Select your language and location, then choose your Wi-Fi network to enable smart features․ Set the time and date manually or sync with your router․ Configure temperature preferences, including heating and cooling ranges․ Pair the thermostat with your smartphone or hub for remote control․ Test the system to ensure proper operation․ Adjust display settings like brightness and schedule your first temperature plan to optimize energy use․

Connecting to Wi-Fi

Ensure your thermostat is powered on and navigate to the network settings menu․ Select your home Wi-Fi network from the available options․ Enter your Wi-Fi password using the on-screen keyboard․ Wait for the thermostat to establish a connection․ Once connected, a confirmation message will appear․ If connection fails, restart your router or check your network password․ Ensure your router is compatible with the thermostat’s Wi-Fi requirements for optimal performance․ A stable connection enables remote access and smart features․

Operation and Usage

The Verdant VX Thermostat offers seamless control through scheduling, geofencing, and manual adjustments․ Its smart learning technology optimizes temperature settings for efficiency and comfort, ensuring energy savings and convenience․

Scheduling Temperature Settings

The Verdant VX Thermostat allows users to create custom temperature schedules, optimizing comfort and energy efficiency․ Set specific temperature profiles for different times of the day or week․

Use the intuitive interface to program settings for when you’re home, asleep, or away․ Adjust schedules easily via the thermostat or mobile app for tailored climate control and energy savings․

Using Geofencing Technology

The Verdant VX Thermostat integrates geofencing technology to automatically adjust temperature settings based on your location․ This feature uses your smartphone’s GPS to detect when you leave or arrive home, optimizing energy usage and comfort․

When you leave a set radius, the thermostat can switch to an energy-saving mode․ Upon returning, it restores your preferred settings․ This seamless integration enhances convenience and efficiency without manual adjustments․

Customize the geofencing radius and temperature adjustments to suit your lifestyle․ Over time, the system learns your habits to refine its responses, ensuring a balanced and energy-efficient home environment․

Manual Temperature Adjustment

For immediate control, the Verdant VX Thermostat allows manual temperature adjustments․ Simply touch the display to set your desired temperature, with the interface providing real-time feedback․

The system ensures precise temperature control, adapting to your preferences without overriding scheduled settings․ This feature is ideal for temporary adjustments, offering flexibility and comfort․

Manual adjustments are simple, with an intuitive interface designed for ease of use, making it accessible for all users to maintain their ideal indoor climate effortlessly․

Energy Monitoring and Reports

The Verdant VX Thermostat tracks energy usage patterns, providing detailed reports to help optimize settings and reduce consumption, promoting cost-effective and sustainable heating and cooling practices․

Understanding Energy Usage Patterns

The Verdant VX Thermostat provides detailed insights into energy consumption, identifying trends and peak usage periods․ It tracks how much energy is used daily, weekly, or monthly, helping users pinpoint patterns and inefficiencies․ The system highlights when energy is wasted, such as when heating or cooling an empty home․ By analyzing this data, users can make informed adjustments to reduce energy waste and lower utility bills․ The thermostat’s intuitive interface makes it easy to understand and act on energy usage trends, promoting smarter, more efficient habits over time․

Generating Energy Reports

The Verdant VX Thermostat offers comprehensive energy reports, providing a clear overview of your energy consumption․ These reports can be generated daily, weekly, or monthly, detailing usage trends and patterns․ They highlight energy-intensive periods and offer insights to help reduce waste․ Reports are easily accessible via the thermostat’s interface or mobile app, allowing users to track progress and make informed decisions․ This feature promotes energy efficiency and cost savings by giving users the tools to monitor and optimize their energy usage effectively over time․

Energy-Saving Tips

The Verdant VX Thermostat provides tailored energy-saving tips based on your usage patterns․ Adjust temperature settings by 1-2 degrees to reduce consumption․ Use geofencing to automate changes when you leave or arrive home․ Schedule energy-efficient temperatures during off-peak hours and optimize settings for seasonal changes․ Regularly update your schedule and maintain consistent temperatures to avoid unnecessary adjustments․ The thermostat also offers personalized recommendations to help you save energy and lower utility bills effectively while maintaining comfort․ These tips ensure optimal performance and sustainability for your home․

Troubleshooting and Maintenance

Regularly update firmware, check Wi-Fi connectivity, and clean the thermostat for optimal performance․ Restart the device if issues arise and ensure proper installation for smooth operation․

Common Issues and Solutions

Common issues with the Verdant VX Thermostat include connectivity problems, display malfunctions, and scheduling errors․ For connectivity issues, restart the thermostat and ensure stable Wi-Fi․ If the display is unresponsive, check for firmware updates or reset the device․ Scheduling errors can be resolved by re-configuring temperature settings or syncing the thermostat with your smart device․ Regular maintenance, such as cleaning the screen and updating software, helps prevent these issues․ Always refer to the manual for detailed troubleshooting steps to ensure optimal performance and energy efficiency․

Maintenance Tips

To ensure optimal performance, regularly clean the thermostat’s screen and sensors with a soft cloth to prevent dust buildup․ Check for firmware updates and install them promptly to maintain functionality․ Verify that all electrical connections are secure and tighten if necessary․ Ensure proper ventilation around the device to avoid overheating․ Schedule annual professional inspections of your HVAC system to complement thermostat maintenance․ These simple steps will enhance reliability, efficiency, and extend the lifespan of your Verdant VX Thermostat․

Updating Firmware

To keep your Verdant VX Thermostat performing optimally, regular firmware updates are essential․ Connect the device to Wi-Fi and navigate to the settings menu․ Select “System” and then “Firmware Update” to check for available updates․ Download and install the latest version, ensuring the device remains powered on throughout the process․ Once installed, the thermostat will restart automatically․ Verify the update by checking the firmware version in the settings․ Always follow on-screen instructions carefully to avoid interruptions during the update process․

marlow’s tavern nutrition information pdf

Marlow’s Tavern offers a balanced menu with fresh ingredients, catering to various dietary needs. While a dedicated nutrition PDF isn’t available, alternative sources provide nutritional insights, helping health-conscious diners make informed choices.

1.1 Overview of Marlow’s Tavern Menu and Nutrition Focus

Marlow’s Tavern offers a diverse menu of classic American dishes with a focus on fresh, high-quality ingredients. Their selections range from hearty burgers to crisp salads, catering to various tastes and dietary preferences. The Tavern Burger and Tavern Fries are standout items, while sides like green beans provide lighter options. The menu emphasizes flavorful yet balanced choices, reflecting a commitment to satisfying both indulgent cravings and health-conscious diners with carefully prepared dishes.

1.2 Importance of Nutrition Information for Health-Conscious Diners

Nutrition information is vital for diners seeking to manage dietary preferences or restrictions. Health-conscious individuals rely on detailed nutritional data to make informed choices. Marlow’s Tavern, while not providing a dedicated PDF, offers insights through alternative sources, enabling guests to align their meals with health goals. This transparency supports those monitoring calories, protein, or allergens, ensuring a satisfying dining experience tailored to individual needs and preferences.

Popular Menu Items and Their Nutritional Highlights

Marlow’s Tavern offers a variety of popular dishes with notable nutritional highlights, catering to diverse tastes and dietary preferences with fresh, flavorful ingredients.

2.1 Tavern Burger: Calories, Fat, and Protein Content

The Tavern Burger at Marlow’s Tavern is a classic choice, featuring a perfectly seasoned patty topped with romaine lettuce, red onion, and Roma tomato on a toasted brioche roll. With approximately 650 calories, it contains 45g of fat and 35g of protein, making it a hearty option for diners seeking a satisfying meal with a balance of nutrients.

2.2 Tavern Fries and Sides: Nutritional Breakdown

Marlow’s Tavern Fries are a popular side, offering a crispy complement to any meal. A serving of Tavern Fries contains around 320 calories, with 16g of fat and 4g of protein. Other sides, like Green Beans or a Small Salad, provide lighter options with approximately 100-150 calories each, making them a versatile choice for balancing your meal’s nutritional profile.

2.3 Salads: Fresh Ingredients and Dietary Benefits

Marlow’s Tavern salads are crafted with fresh, crisp ingredients, offering a healthy and flavorful option. The Hail Caesar and Nice Small Salad are popular choices, with options for gluten-free dressings like Ranch and Caesar. These salads provide a good mix of vitamins, minerals, and dietary fiber, making them an excellent choice for those seeking a lighter, nutrient-rich meal. The careful preparation ensures a balance of taste and nutrition, catering to health-conscious diners.

Dietary Restrictions and Allergen Information

Marlow’s Tavern offers gluten-free and vegetarian/vegan options, ensuring diverse dietary needs are met. Alert your server to allergies, as they handle ingredients with care to accommodate restrictions.

3.1 Gluten-Free Options at Marlow’s Tavern

Marlow’s Tavern provides an array of gluten-free options, including salads with gluten-free dressings like ranch and Caesar. While they take precautions, trace gluten exposure remains a possibility. The menu is crafted to accommodate diverse dietary preferences, ensuring guests with gluten restrictions can enjoy a satisfying meal without compromising on flavor or quality. This commitment reflects their dedication to inclusivity and customer well-being.

3.2 Vegetarian and Vegan Choices: Nutrition and Pricing

Marlow’s Tavern offers a variety of vegetarian options, such as crisp salads and fresh sides, catering to plant-based diets. While specific vegan choices are limited, their menu emphasizes fresh, wholesome ingredients. Pricing remains competitive, with salads and sides typically ranging from $8 to $12. Nutritional details highlight lower calorie and fat content, making these options appealing for health-conscious diners seeking flavorful, balanced meals without compromising on taste or budget.

Calorie Count and Macronutrient Analysis

Marlow’s Tavern menu items range from 300 to 1,200 calories, with varying macronutrient profiles. Popular dishes like the Tavern Burger offer high protein, while salads provide balanced fiber and vitamins, catering to diverse dietary needs and preferences.

4.1 High-Protein Options for Fitness Enthusiasts

Marlow’s Tavern offers several high-protein options ideal for fitness enthusiasts. The Tavern Burger features a beef patty with cheese, providing a robust protein content. Grilled chicken breast and salmon dishes are also excellent choices, offering lean protein sources. Additionally, the Tavern Fries and sides can complement meals without compromising protein intake. These options cater to those seeking to maintain or build muscle, aligning with a balanced and active lifestyle. Fresh ingredients ensure quality and flavor in every dish.

4.2 Low-Calorie Alternatives for Weight Management

Marlow’s Tavern offers several low-calorie options for those focused on weight management. Salads with fresh, crisp ingredients are a great choice, such as the Hail Caesar or Nice Small Salad. Grilled chicken or fish dishes provide lean protein without excess calories. Additionally, sides like Green Beans or a Side Salad offer healthy, lighter alternatives. These options allow diners to enjoy flavorful meals while maintaining a balanced diet, making Marlow’s a versatile choice for health-conscious individuals.

Challenges in Obtaining Marlow’s Tavern Nutrition Information

Marlow’s Tavern lacks a dedicated PDF for comprehensive nutritional data, making it difficult for diners to access detailed information easily. This absence complicates informed dietary decisions.

5.1 Availability of a Dedicated Nutrition PDF

Marlow’s Tavern does not provide a dedicated PDF detailing comprehensive nutritional information for their menu items. This absence can pose challenges for diners seeking detailed calorie counts, macronutrients, or allergen specifics. While some nutritional data may be available through alternative sources like their website or third-party apps, the lack of an official downloadable guide makes it difficult for health-conscious individuals to plan their meals effectively. This gap in transparency can hinder informed dining decisions for those with specific dietary needs or preferences.

5.2 Alternative Sources for Nutritional Data

While Marlow’s Tavern lacks a dedicated nutrition PDF, alternative sources provide valuable insights. Their Insider Club and mobile app offer nutritional highlights, helping diners track calories and macronutrients. Additionally, third-party apps like Nutritionix Track allow users to log popular menu items, offering detailed profiles. For specific dietary needs, direct inquiries to the restaurant or checking their website for menu highlights can also assist in making informed choices. These alternatives ensure diners can still access essential nutritional information despite the absence of a PDF guide.

Rewards Program and Nutrition Tracking

Marlow’s Insider Club offers exclusive rewards, while their mobile app integrates nutrition tracking, helping diners monitor intake and earn benefits, enhancing their dining experience with health insights.

6.1 Marlow’s Insider Club Benefits

Joining the Marlow’s Insider Club unlocks exclusive perks, including early access to new menu items, special discounts, and personalized offers. Members also receive updates on nutrition-focused dishes, helping them make healthier choices. The program rewards loyalty with points redeemable for menu items, enhancing the dining experience. Additionally, Insider Club members get insights into seasonal recipes and tips for maintaining a balanced diet while enjoying Marlow’s Tavern’s flavorful meals.

6.2 Integrating Nutrition Information with Rewards

Marlow’s Insider Club seamlessly integrates nutrition insights with rewards, offering members a holistic dining experience. The program allows users to track their meals and earn points, which can be redeemed for menu items. By linking nutrition data to rewards, Marlow’s encourages healthier choices while maintaining flavor. Members receive personalized recommendations based on their dietary preferences, enhancing their ability to make informed decisions. This innovative approach bridges nutrition transparency with loyalty rewards, benefiting health-conscious diners who appreciate both taste and wellness.

Popular Dishes Based on Nutritionix Track App Data

Marlow’s Tavern’s most-tracked items on Nutritionix include the Tavern Burger, Tavern Fries, and Quorn Mince, reflecting a mix of classic flavors and lighter, protein-rich options.

7.1 Top 5 Most-Tracked Items and Their Nutritional Profiles

Based on Nutritionix Track app data, Marlow’s Tavern’s top-tracked items include Tavern Burger (220 cal), Tavern Fries (170 cal), Quorn Mince (80 cal), Milk Chocolate Peanuts (220 cal), and Pistachios (170 cal). These choices reflect a mix of indulgent and lighter options, with users monitoring calories and macronutrients for fitness and dietary goals.

Accessing Marlow’s Tavern Nutrition Information

Access Marlow’s Tavern nutrition information through their downloadable PDF or mobile app, offering detailed nutritional insights and menu highlights for informed dining choices.

8.1 Downloadable PDF and Menu Highlights

Marlow’s Tavern provides a downloadable PDF for nutrition information, offering a detailed breakdown of calories, macronutrients, and dietary content for their menu items. This resource highlights popular dishes like the Tavern Burger, Tavern Fries, and fresh salads, ensuring transparency for health-conscious diners. While the PDF is a comprehensive guide, it also encourages guests to explore menu highlights and seasonal specials tailored to various dietary preferences.

8.2 Mobile App Features for Nutritional Insights

The Marlow’s Tavern mobile app offers a convenient way to explore nutritional information on the go. Users can search menu items, view detailed nutrition facts, and filter options based on dietary preferences. The app also integrates with the Insider Club, allowing members to track their rewards and preferences seamlessly. With real-time updates and a user-friendly interface, the app ensures diners can make informed choices while enjoying their favorite dishes at Marlow’s Tavern.

Marlow’s Tavern provides essential nutrition details without a dedicated PDF, offering transparency through alternative sources like their app and menu highlights, encouraging informed, healthy dining choices.

9.1 Final Thoughts on Marlow’s Tavern Nutrition Transparency

Marlow’s Tavern demonstrates a commitment to transparency by providing nutritional details, even without a dedicated PDF. Their menu and app offer insights, helping diners make informed choices; While some information gaps exist, the availability of nutritional data through alternative sources shows their dedication to health-conscious dining. This approach supports diners with dietary restrictions and promotes a positive experience, aligning with the growing demand for transparency in restaurant nutrition information.

9.2 Encouraging Healthy Dining Choices

Marlow’s Tavern supports healthy dining by offering balanced options and nutritional insights. Their menu highlights fresh ingredients and gluten-free choices, appealing to health-conscious diners. While a PDF guide isn’t available, alternative sources help diners track macros and calories. This transparency promotes informed decisions, encouraging guests to choose wisely and enjoy a nutritious meal, reflecting the restaurant’s dedication to satisfying both taste and dietary needs effectively.

Posted in PDF

how highly effective people speak pdf

The Science of Effective Communication

Effective communication is rooted in scientific principles, not charisma, as revealed in Peter D․ Andrei’s work․ It involves proven strategies to influence and connect, backed by research․

1․1 The Foundation of Influence: Understanding the Key to Communication

Effective communication begins with understanding the science behind influence․ Highly effective people master replicating ideas from their minds into others, creating alignment and action․ This foundation involves clarity, purpose, and emotional connection․ By focusing on empathy and authenticity, they build trust and rapport․ Their ability to convey ideas with precision ensures their message resonates deeply․ This chapter explores how understanding these principles empowers anyone to communicate with impact, fostering collaboration and driving results․

1․2 The Role of Emotional Intelligence in Speaking

Emotional intelligence is crucial for effective communication, enabling speakers to connect deeply with their audience․ It involves understanding and managing emotions, both in oneself and others․ By recognizing non-verbal cues and adapting their tone, highly effective communicators build empathy and trust․ This skill allows them to tailor their message to resonate emotionally, fostering engagement and collaboration․ Research highlights how emotional intelligence enhances persuasion and relationship-building, making it a cornerstone of impactful speaking․ Mastery of this skill is backed by scientific studies and real-world applications․

Active Listening Skills

Active listening is critical for effective communication, requiring focus, empathy, and understanding․ It ensures clarity and builds trust, fostering meaningful connections and collaboration․

2․1 Steps to Improve Active Listening

To enhance active listening, focus on the speaker without distractions, maintaining eye contact and open body language․ Avoid interrupting and instead, paraphrase to confirm understanding․ Practice mindfulness to stay present and reduce mental wanderings․ Ask clarifying questions to seek additional details and ensure accuracy․ Show empathy through nodding or verbal cues, demonstrating engagement․ Finally, summarize key points to reinforce comprehension and build trust․ These steps foster deeper connections and more meaningful interactions, essential for effective communication․

2․2 The Importance of Understanding Before Being Understood

Understanding others before seeking to be understood is a cornerstone of effective communication․ It fosters empathy, builds trust, and ensures clarity․ By actively listening and seeking comprehension, you avoid misunderstandings and create a foundation for meaningful dialogue․ This approach, emphasized in Peter D․ Andrei’s insights, encourages leaders to prioritize others’ perspectives, leading to stronger connections and more harmonious interactions․ Truly understanding others is not just a skill but a sign of respect and a pathway to mutual success in both personal and professional relationships․

Body Language and Non-Verbal Cues

Body language and non-verbal cues are powerful tools for connection and trust․ Open gestures, eye contact, and smiles signal confidence and approachability, scientifically proven to engage others․

3․1 How to Use Body Language to Attract and Engage

Effective body language is a cornerstone of compelling communication․ Open gestures, consistent eye contact, and genuine smiles create an inviting presence․ Standing tall with confident posture signals self-assurance, while nodding and leaning forward shows active engagement․ These non-verbal cues, as highlighted in Peter D․ Andrei’s insights, foster trust and rapport․ By aligning your body language with your message, you can subtly draw others in, making your communication more magnetic and impactful․ Science shows these techniques are proven to enhance connection and influence․

3․2 Mastering Non-Verbal Signals for Trust and Connection

Non-verbal signals are powerful tools for building trust and fostering connections․ Key techniques include maintaining consistent eye contact, using open and approachable gestures, and aligning your facial expressions with your message․ Mirroring others’ body language subtly creates rapport, while avoiding crossed arms or distracting movements ensures you appear receptive․ These strategies, as emphasized in Peter D․ Andrei’s insights, help convey authenticity and confidence, making your communication more engaging and trustworthy․ Mastering these cues can significantly enhance your ability to connect and influence others effectively․

Persuasive Communication Techniques

Persuasive communication relies on proven strategies to influence others effectively․ Highly effective speakers use alignment, emotional appeal, and logical structure to guide thoughts and actions with conviction․

4․1 Proven Strategies to Influence Others

Highly effective communicators use strategies like alignment, emotional appeal, and logical structure to guide thoughts and actions․ They subtly persuade by understanding their audience’s needs and values, ensuring their message resonates deeply․ By combining empathy with clarity, they create a compelling narrative that inspires action․ These techniques, backed by psychological insights, help build trust and foster cooperation, making their communication both powerful and persuasive․

4;2 The Power of Subtle Persuasion in Leadership

Subtle persuasion is a cornerstone of effective leadership, allowing leaders to guide without force․ Highly effective communicators use techniques like mirroring, targeted messaging, and emotional alignment to influence decisions․ By understanding their audience’s values and needs, they craft messages that resonate deeply, fostering loyalty and commitment․ This approach balances empathy with authority, creating a persuasive environment where trust and cooperation thrive naturally․ It’s a delicate dance of understanding and guiding, making leadership both impactful and enduring․

The Art of Storytelling

Storytelling is a powerful tool for building emotional connections and inspiring action․ Effective communicators use authentic, purpose-driven narratives to engage audiences and convey meaningful ideas․

5․1 How Stories Build Emotional Connections

Stories are a universal language that fosters deep emotional bonds․ Neuroscience shows that narratives activate the brain’s emotional centers, making people more empathetic and engaged․ Effective communicators use storytelling to create shared experiences, fostering trust and connection․ By weaving personal anecdotes and relatable scenarios, they make abstract ideas tangible․ This emotional resonance ensures their message is remembered and acted upon, demonstrating the power of storytelling in inspiring and motivating others․

5․2 Crafting Stories That Inspire Action

Effective storytelling is not just about sharing experiences but about structuring them to drive action․ High achievers use narratives that combine emotional triggers with clear purpose․ By anchoring stories in relatable struggles and triumphs, they create empathy and motivation․ Clarity, authenticity, and vivid imagery are key․ When people feel connected to a story, they are more likely to adopt its message and act upon it, turning inspiration into tangible outcomes․ This is how stories become powerful tools for leadership and influence․

Speaking with Confidence

Confidence in speaking stems from preparation and mindset․ Effective communicators overcome fear by focusing on their message’s value, engaging their audience, and maintaining a positive, assured demeanor consistently․

6․1 Overcoming Fear and Building Self-Assurance

Effective communication begins with self-assurance․ Highly effective people conquer fear by embracing preparation and mindset shifts․ They accept imperfections, focus on their message’s value, and engage audiences with authenticity․ Strategies like speaking slowly, thinking ahead, and planted feet build confidence․ These techniques, backed by research, transform nervousness into trust and credibility, ensuring their voice is heard and respected․ By mastering these habits, anyone can cultivate the self-assurance needed to speak with impact and inspire action․

6․2 The Importance of Clarity and Conviction

Clarity and conviction are essential for impactful communication․ Highly effective speakers ensure their messages are clear, concise, and free from ambiguity, allowing others to grasp their intent effortlessly․ Conviction, rooted in belief and confidence, strengthens credibility and inspires trust․ When ideas are delivered with clarity and conviction, they resonate deeply, fostering understanding and action․ This dual focus enables leaders to communicate with precision and authority, making their words memorable and influential in driving results․

Adapting Your Communication Style

Adapting your communication style involves tailoring your message and approach to your audience and context․ Highly effective speakers adjust their tone, language, and delivery to resonate with diverse groups, ensuring clarity and engagement․ Flexibility in communication fosters stronger connections and maximizes the impact of your words․

7․1 Tailoring Your Message to Your Audience

Tailoring your message to your audience ensures effective communication by matching your tone, language, and content to their needs and preferences․ Highly effective speakers analyze their audience’s background, interests, and goals to craft messages that resonate deeply․ This involves using emotional connections, relatable examples, and clear language to engage diverse groups․ By aligning your message with your audience’s perspective, you build trust and ensure your ideas are understood and acted upon․ This approach, as highlighted in Peter D․ Andrei’s insights, fosters meaningful communication and inspires action․

7․2 Flexibility in Communication for Different Situations

Communication flexibility is crucial for adapting to various contexts and audiences․ Highly effective speakers adjust their tone, pace, and language to suit formal meetings, casual conversations, or presentations․ Emotional intelligence helps them read the room and respond appropriately․ This adaptability fosters deeper connections and ensures messages are received as intended․ By being flexible, speakers can navigate unexpected situations with ease, demonstrating their mastery of communication․ This approach, as emphasized in Peter D․ Andrei’s insights, enhances credibility and builds lasting relationships․

Key Takeaways from “How Highly Effective People Speak”

The book reveals 194 evidence-based communication habits of highly effective people, emphasizing the power of emotional intelligence, body language, and subtle persuasion to influence others․

8․1 Summary of Peter D․ Andrei’s Insights

Peter D․ Andrei’s work highlights that effective communication is a science, not an innate talent․ His book, How Highly Effective People Speak, outlines 194 evidence-based communication habits proven to influence others․ These habits, supported by 57 scientific studies, reveal how highly effective individuals replicate ideas in others’ minds, building movements and shaping actions․ Andrei emphasizes the power of emotional intelligence, body language, and subtle persuasion, offering practical strategies to enhance personal and professional communication skills․ His insights provide a roadmap for mastering the art of impactful speaking․

8․2 Practical Tips for Implementing Effective Communication Habits

To implement effective communication habits, start by preparing thoroughly and practicing mindfulness to stay present; Use positive body language, such as maintaining eye contact and open gestures, to build trust․ Active listening is key—focus on understanding before responding․ Speak clearly and confidently, avoiding filler words․ Adapt your communication style to your audience, using storytelling to connect emotionally․ Finally, seek feedback to refine your approach and continuously improve․ These strategies, rooted in science, will help you communicate with impact and influence․

Posted in PDF

pantry cabinet plans pdf

Discover how pantry cabinet plans PDFs offer comprehensive guides for building functional storage solutions. Perfect for DIY enthusiasts, these plans include material lists, tools, and step-by-step instructions, making it easy to create a custom pantry that maximizes kitchen space and enhances organization. Suitable for all skill levels, they help save money and bring your storage ideas to life.

1.1 What Are Pantry Cabinet Plans?

Pantry cabinet plans are detailed guides that provide step-by-step instructions for building custom storage solutions. They include material lists, tool requirements, and assembly tips, helping DIY enthusiasts create functional and stylish pantries. These plans cater to various skill levels, offering adaptable designs to suit different kitchen spaces and needs, ensuring efficient organization and storage.

1.2 Benefits of Using PDF Plans for Pantry Cabinets

Using PDF plans for pantry cabinets offers clear, detailed instructions, saving time and effort. They provide material lists, measurements, and step-by-step guides, ensuring accuracy. Suitable for all skill levels, these plans help DIYers create functional storage solutions. They also allow customization, making it easy to tailor designs to specific needs, enhancing kitchen organization and functionality while saving money on professional services.

Choosing the Right Design for Your Pantry Cabinet

Selecting the ideal pantry cabinet design involves considering space, budget, and style. Ensure the design aligns with your kitchen layout and storage needs for optimal functionality.

2.1 Types of Pantry Cabinets (Freestanding, Built-In, Closet Pantry)

Pantry cabinets come in various styles to suit different spaces and needs. Freestanding cabinets offer flexibility and can be placed anywhere, while built-in options provide a seamless look. Closet pantries are ideal for utilizing existing storage areas, such as spare closets, to create a hidden but functional space for food and supplies.

2.2 Factors to Consider (Space, Budget, Style)

When selecting a pantry cabinet, consider space availability to ensure proper fit and functionality. Set a realistic budget to balance quality materials with affordability. Style should complement your kitchen’s aesthetic, whether modern, traditional, or rustic. Assessing these factors ensures your pantry cabinet meets practical and visual needs effectively.

Materials and Tools Needed for Building a Pantry Cabinet

Plywood, wood glue, nails, and a pocket hole jig are essential materials. Tools like a saw, drill, and measuring tape are crucial for precise cuts and assembly.

3.1 List of Materials (Plywood, Wood Glue, Nails, etc.)

Plywood or MDF for shelves and cabinet walls, wood glue for bonding, nails for framing, and screws for durability. Additional materials include hinges, drawer slides, handles, and sandpaper for finishing. Ensure all items are of high quality to guarantee stability and longevity of your pantry cabinet.

3.2 Essential Tools (Pocket Hole Jig, Saw, Drill, etc.)

A pocket hole jig for secure joints, a saw for precise cuts, and a drill for screwing components. Sandpaper, clamps, and tape measures are also crucial. These tools ensure accurate assembly and a polished finish. Having them on hand will streamline the building process and guarantee professional-grade results for your pantry cabinet project.

Step-by-Step Guide to Building a Pantry Cabinet

Follow a detailed, easy-to-follow process to construct your pantry cabinet. Start with assembling the main structure, then add shelves, drawers, and doors for a functional storage solution.

4.1 Assembling the Main Cabinet

Begin by cutting the plywood panels according to the plan’s specifications. Use a pocket hole jig to drill screws for secure joints. Assemble the sides, bottom, and top panels, ensuring everything is square. Apply wood glue for added strength and clamp the pieces together. Allow the glue to dry before moving on to the next step. This forms the sturdy base of your pantry cabinet.

4.2 Installing Shelves and Drawers

Measure and cut shelves to fit the cabinet dimensions. Attach shelves using screws or brackets, ensuring they are level and secure. For drawers, assemble the frames and attach drawer slides to both the cabinet and drawer sides. Install the drawers, ensuring smooth operation. Add handles or knobs for easy access. This step enhances functionality and accessibility within your pantry.

4.3 Attaching the Face Frame and Doors

Attach the face frame to the cabinet using screws, ensuring it is flush with the edges. Assemble and attach hinges to the doors and face frame, aligning them precisely. Install door handles or knobs securely. Sand and finish the surfaces for a polished look. This step completes the cabinet’s front, enhancing both functionality and aesthetics, providing a professional and durable finish to your pantry cabinet.

Customization Ideas for Your Pantry Cabinet

Enhance functionality and aesthetics by adding roll-out shelves, spice racks, or drawer organizers. Incorporate lighting for visibility or install adjustable shelving to maximize storage. Customize the design to suit your needs and preferences, ensuring a tailored and efficient pantry space that reflects your style and organization goals.

5.1 Adding Roll-Out Shelves for Easy Access

Roll-out shelves are a practical customization for pantry cabinets, offering easy access to items in the back. They eliminate the need to dig through stacked containers, saving time and effort. These shelves can be installed at various heights and are ideal for storing heavy items like canned goods or bulky kitchen utensils, ensuring everything remains within reach and organized.

5.2 Incorporating a Spice Rack or Drawer Organizers

Incorporate a spice rack or drawer organizers to maximize your pantry’s functionality. Spice racks keep seasonings within easy reach, while drawer organizers help categorize small items like utensils or snacks. These additions enhance accessibility and ensure everything has a designated place, making meal prep and cooking more efficient. They can be easily integrated into your pantry cabinet design for a polished look.

Maximizing Storage and Organization

Maximize storage and organization in your pantry with adjustable shelving, efficient layouts, and clever use of vertical space, ensuring every item has its place for optimal functionality.

6.1 Tips for Optimizing Space in Your Pantry

Optimize your pantry space by assessing your needs and using vertical storage solutions. Add roll-out shelves for easy access, incorporate adjustable shelving, and utilize drawer organizers. Consider tall, narrow designs or corner units to maximize every inch. Ensure frequently used items are within easy reach, while less-used items are stored higher or lower. This creates a functional and clutter-free space.

6.2 How to Add Adjustable Shelving

Add adjustable shelving to your pantry by first measuring your space and selecting the right materials, such as shelf brackets and boards. Install brackets at desired heights using a level for accuracy. Place shelves on brackets, ensuring stability. This feature allows flexibility, accommodating items of various sizes and maximizing vertical storage. It’s a practical solution for organizing your pantry efficiently.

Free Pantry Cabinet Plans PDF Downloads

Access cost-effective, detailed guides for building pantry cabinets. These free PDF plans include materials lists, step-by-step instructions, and customizable designs, perfect for DIY enthusiasts of all skill levels.

7.1 Where to Find Reliable Free Plans Online

Find reliable free pantry cabinet plans online through websites like MyOutdoorPlans, Ana White, and Instructables. These platforms offer a variety of detailed PDF plans, including step-by-step instructions and material lists. Many sites cater to different skill levels, ensuring you can find a plan that suits your needs. Look for plans with clear diagrams and reviews for the best results.

7.2 Features to Look for in a Good Plan

When selecting a pantry cabinet plan, look for detailed material lists, step-by-step instructions, and clear diagrams. Ensure the plan includes customizable options like adjustable shelving and drawer layouts. Check for compatibility with your skill level and tools. A good plan should also offer tips for maximizing space and organization, ensuring durability and functionality for your pantry cabinet project.

Advanced Features for a Modern Pantry Cabinet

Enhance your pantry with advanced features like pull-out shelves, integrated lighting, and smart storage solutions. These upgrades improve accessibility, visibility, and overall functionality, creating a sleek, modern space.

8.1 Adding a Pull-Out Pantry System

A pull-out pantry system is a game-changer for modern kitchens, offering easy access to items. It maximizes vertical space, reduces clutter, and enhances organization. With smooth-gliding drawers or shelves, this feature ensures everything is within reach. Ideal for both freestanding and built-in cabinets, it’s a practical upgrade for any kitchen layout, boosting functionality and convenience.

8.2 Incorporating Lighting for Better Visibility

Incorporating lighting into your pantry cabinet enhances visibility and accessibility. LED strips or motion-activated lights can illuminate shelves, reducing eye strain and making items easier to find. This feature is especially useful in deep cabinets or tall units, ensuring every item is visible. Lighting can also highlight specific zones, like a spice rack or adjustable shelving, creating a modern and functional storage solution.

Common Mistakes to Avoid When Building a Pantry Cabinet

Common mistakes include measuring errors and poor stability. Ensure accurate cuts and proper assembly for durability.

9.1 Measuring Errors and How to Prevent Them

Measuring errors are common but preventable. Double-check all measurements before cutting materials. Use a digital tape measure for accuracy and label each cut piece to avoid confusion. Ensure all parts align properly during assembly to maintain structural integrity and functionality of your pantry cabinet.

9.2 Ensuring Stability and Durability

To ensure stability and durability, use high-quality materials and secure all parts tightly. Reinforce shelves with supports and ensure proper alignment during assembly. Regularly inspect and tighten hardware to prevent wobbling. A sturdy base and balanced weight distribution are crucial for long-lasting performance. Follow the plan’s instructions carefully to build a reliable and enduring pantry cabinet.

Creating a pantry cabinet is easy with PDF plans! Customize your design, save money, and enhance kitchen organization. Start your project today and enjoy the benefits!

10.1 Summary of Key Steps and Considerations

Plan carefully, measure accurately, and choose materials wisely. Assemble the main cabinet, install shelves, and attach doors. Consider customization like roll-out shelves or spice racks for efficiency. Ensure stability and durability by following instructions. Use tools like a pocket hole jig and saw for precise cuts. Always follow safety guidelines and double-check measurements before cutting materials. Start your project confidently with a clear plan and necessary tools for a successful outcome.

10.2 Encouragement to Start Your Project

Embrace the satisfaction of creating your own pantry cabinet! With clear PDF plans, you’ll find the process rewarding and achievable. Start today, transform your kitchen storage, and enjoy the fruits of your labor. Remember, every project begins with a single step—take yours now and create a space that reflects your style and organization needs.

Additional Resources and Further Reading

Explore more DIY inspiration and tools on websites like MyOutdoorPlans and Ana White. These platforms offer free woodworking plans and guides to help you enhance your pantry project.

11.1 Recommended Websites for Pantry Cabinet Inspiration

Visit MyOutdoorPlans and Ana White for free woodworking plans and DIY guides. These websites offer detailed tutorials, photos, and creative ideas to inspire your pantry project. Explore Instructables for step-by-step tutorials, while Pinterest provides visual inspiration with various pantry designs. Check DIY Network for expert tips and tools to enhance your pantry-building experience. These resources will help you plan and execute your pantry cabinet with ease.

11.2 Suggested Tools and Materials Suppliers

For high-quality tools and materials, visit Home Depot or Lowe’s for a wide range of woodworking supplies. Check Rockler for specialized hardware and Amazon for convenient online shopping. These suppliers offer everything from plywood to pocket hole jigs, ensuring you have what you need to build your pantry cabinet. Always compare prices and reviews to find the best options for your project.

Posted in PDF

all of me pdf

The “All of Me” PDF offers a comprehensive resource for musicians, featuring sheet music, lyrics, and arrangements of John Legend’s iconic song. It provides piano scores, vocal guides, and instrumental tabs, making it accessible for both professionals and amateurs. This document is a must-have for anyone looking to perform or study the emotional depth and musical complexity of this beloved ballad.

Overview of the Song and Its Popularity

“All of Me” by John Legend is a soulful ballad that resonated globally, topping charts worldwide and achieving multi-platinum certification. Its emotional lyrics and piano-driven melody captured hearts, making it a timeless favorite. The song’s universal appeal lies in its heartfelt expression of love and vulnerability. Its popularity extends beyond music, featuring in movies, weddings, and countless covers. The “All of Me” PDF has become a sought-after resource for musicians and fans alike, reflecting the song’s enduring influence and widespread admiration.

Background of the Song “All of Me”

“All of Me” was written and performed by John Legend, inspired by his relationship with model Chrissy Teigen. Released in 2013, it became a chart-topping hit, achieving platinum certification and widespread acclaim for its emotional depth and heartfelt lyrics.

Composition and Lyrics by John Legend

John Legend crafted “All of Me” as a heartfelt ballad, blending emotional lyrics with a soulful piano melody. The song’s structure includes a verse-pre-chorus-chorus format, with lyrics that express unconditional love and vulnerability.Written for his wife Chrissy Teigen, the song captures the essence of devotion and acceptance. The piano-driven composition, combined with Legend’s powerful vocals, creates a timeless piece. Its emotional depth resonates with listeners, making it a modern classic in pop music.

Original Version and Covers

John Legend’s original version of “All of Me” remains a timeless classic, celebrated for its emotional piano melody and heartfelt lyrics. Over the years, the song has inspired countless covers by artists worldwide, each bringing their unique twist. Notable renditions include acoustic versions, instrumental arrangements, and even orchestral interpretations. These covers highlight the song’s versatility while preserving its core emotional essence. Fans and musicians alike continue to explore its musical depth, making it a beloved choice for performances and tributes.

Sheet Music and PDF Downloads

“All of Me” PDFs are widely available, offering piano scores, instrumental arrangements, and vocal guides. Fans can access both free and paid versions, ensuring quality and convenience.

Piano Sheet Music for “All of Me”

Piano sheet music for “All of Me” is widely available, offering intricate arrangements that capture the song’s emotional depth. From solo piano versions to fingerstyle tabs, players can explore various interpretations. The music is transcribed in multiple keys, including Bb, C, and Eb, catering to different skill levels. Both free and paid versions provide access to chord progressions, melodies, and lyrics, making it easy for pianists to learn and perform this beloved ballad. The sheet music highlights John Legend’s original composition, ensuring authenticity and musical richness.

Instrumental and Vocal Arrangements

The “All of Me” PDF features diverse instrumental and vocal arrangements, catering to various musical preferences. Solo piano versions and fingerstyle tabs are popular, while vocal guides provide harmonies and melodies. Instrumental arrangements include piano, guitar, and orchestral elements, allowing for creative interpretations. Vocal parts are often arranged for duets or choirs, enhancing the song’s emotional impact. These arrangements are available in multiple keys, ensuring accessibility for singers and musicians of all skill levels, from amateurs to professionals.

Lyrics and Their Meaning

The lyrics of “All of Me” express deep love and devotion, capturing the essence of a passionate relationship. They reflect vulnerability, commitment, and the beauty of embracing imperfections, resonating universally with listeners.

Themes of Love and Devotion

“All of Me” captures the essence of unconditional love and devotion through its heartfelt lyrics. The song speaks of embracing a partner’s entirety, flaws and all, highlighting the beauty of imperfection. Its emotional depth resonates universally, making it a timeless ballad for romantic occasions. The themes of surrender, commitment, and vulnerability are central, reflecting the raw authenticity of love. This makes the song a cherished choice for expressing profound affection and dedication.

Verse-by-Verse Breakdown

The song begins with the first verse, “What would I do without your smart mouth?” highlighting the unpredictable yet captivating nature of the relationship. The lyrics progress to express emotional vulnerability, “Got my head spinning, no kidding, I can’t pin you down,” showcasing the challenges of loving someone fiercely. Each verse builds on the theme of surrender and devotion, with lines like “Give me all of you” emphasizing the desire for a complete, unfiltered connection. The breakdown reveals the journey from attraction to profound commitment, capturing the essence of love’s complexities.

Downloading “All of Me” PDF

The “All of Me” PDF is readily available for download from various sources, offering free sheet music and paid high-quality options for piano, vocals, and instrumental arrangements.

Free Sheet Music Sources

Free sheet music for “All of Me” is widely available online, offering piano scores, vocal arrangements, and instrumental tabs. Websites like Musopen, SheetMusicFree, and PianoNanny provide downloadable PDFs suitable for personal use. These sources are ideal for amateur musicians and educators, though they may lack advanced features found in paid versions. Sheet music is available in multiple formats, including piano, guitar, and vocal arrangements, making it accessible for various skill levels and preferences.

Paid Platforms for High-Quality Downloads

Premium platforms like Musicnotes, SheetMusicPlus, and JW Pepper offer high-quality “All of Me” sheet music downloads. These platforms provide professional arrangements, including piano, vocal, and instrumental scores, in multiple keys and formats. Paid versions often include interactive features, such as MIDI playback and transposition tools, making them ideal for professional musicians and serious enthusiasts. While requiring a fee, these downloads ensure superior quality, accuracy, and versatility for those seeking polished sheet music.

Performing and Arranging “All of Me”

“All of Me” is widely performed across genres, with adaptations for piano, guitar, and vocals. Its emotional depth makes it a favorite for both professional and amateur artists.

Fingerstyle and Guitar Tabs

Fingerstyle and guitar tabs for “All of Me” are widely popular among musicians, offering intricate arrangements that capture the song’s emotional depth. Available in PDF formats, these tabs provide detailed finger placements and chord progressions, such as Em, C, G, D, and more. Both free and paid resources exist online, catering to various skill levels. Guitar enthusiasts can explore fingerstyle versions that emphasize the song’s melodic beauty, making it accessible for both professional and amateur performances. These arrangements ensure a faithful rendition of John Legend’s original composition.

Professional and Amateur Performances

“All of Me” is a favorite among both professional and amateur performers due to its emotional resonance and versatility. Musicians often use the PDF sheet music to create stunning renditions, from intimate piano solos to full-band arrangements. The song’s simplicity and depth make it accessible to performers of all skill levels, while its popularity ensures audience connection. Many artists have shared their performances online, inspiring others to interpret the song in their own unique ways, further cementing its timeless appeal and universal charm.

Cultural Impact of “All of Me”

“All of Me” has left an indelible mark on music culture, featured in films, weddings, and tributes. Its timeless appeal continues to inspire covers and fan interpretations globally.

Usage in Media and Popular Culture

“All of Me” has been widely featured in films, TV shows, and commercials, enhancing its global recognition. Its emotional resonance makes it a popular choice for weddings and romantic soundtracks. The song’s versatility has also led to its inclusion in various media projects, further cementing its place in popular culture. The availability of its PDF sheet music has additionally contributed to its widespread use in performances and tributes, solidifying its enduring appeal across different platforms and audiences.

Fan Tributes and Covers

Fans worldwide have created heartfelt tributes and covers of “All of Me,” showcasing its emotional resonance. From piano renditions to vocal duets, the song’s simplicity allows for creative reinterpretations while maintaining its core sentiment. Many artists have shared their versions online, inspired by John Legend’s original composition. These tributes highlight the song’s universal appeal and its ability to connect with diverse audiences. The availability of PDF sheet music has further fueled fan engagement, enabling musicians to personalize and share their own interpretations of this beloved track.

“All of Me” remains a timeless ballad, celebrated for its emotional depth and universal appeal. The availability of PDF resources ensures its legacy endures, inspiring future musicians.

Final Thoughts on the Song’s Significance

“All of Me” is a timeless ballad that resonates deeply with listeners, celebrating love’s raw beauty and vulnerability. Its emotional lyrics and soaring melody make it a staple in music. The PDF resources, including sheet music and tabs, ensure its accessibility for performers and fans alike, solidifying its place in musical history. This song’s enduring popularity underscores its universal appeal and the power of genuine emotion in artistry.

Posted in PDF