Welcome to the True Controller Manual, your comprehensive guide to understanding, installing, and operating your device․ This manual covers key features, setup, operation, and troubleshooting steps․
Key Features of True Controller Manuals
- Comprehensive temperature control and adjustment guidelines․
- Detailed installation and setup instructions for cabinets and electrical systems․
- Clear operational steps for navigating the control panel and user interface․
- Troubleshooting tips for common issues and maintenance advice․
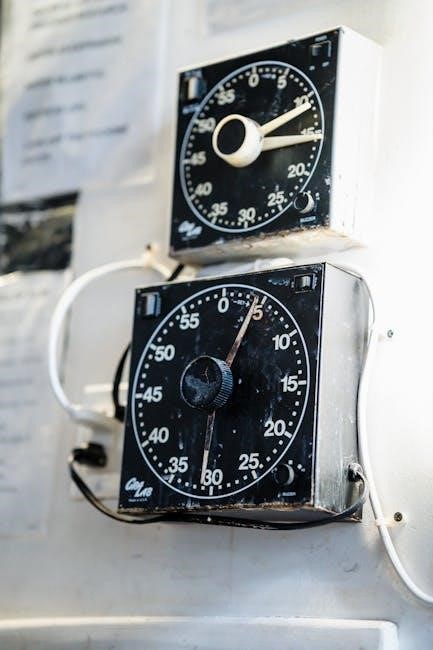
Overview of Controls and Components
The True Controller is equipped with a user-friendly interface designed for precise temperature management․ Key components include a digital display, temperature adjustment buttons, and a defrost control․ The system features advanced sensors for accurate readings and a robust control panel for easy navigation․ Additional components such as wiring harnesses and electrical connectors ensure seamless integration․ The manual provides detailed diagrams and descriptions of each part, ensuring users can identify and understand their functions․ Familiarizing yourself with these components is essential for optimal performance and troubleshooting․ This section serves as a foundation for mastering the controller’s operations and maintenance․
Temperature Control and Adjustment Features
The True Controller offers precise temperature management with advanced adjustment features․ Users can set specific temperature ranges to maintain optimal conditions, ensuring consistent performance․ The controller includes a defrost mode, which can be manually activated or programmed for automatic cycles․ Temperature adjustments are made easy with intuitive buttons and a digital display, allowing for real-time monitoring; The system also supports temperature probes for accurate readings, ensuring reliable operation․ These features enable users to customize settings based on specific requirements, such as refrigeration or freezing applications․ Proper use of these controls is essential for maintaining efficiency and preventing issues like frost buildup․ This section provides detailed guidance on utilizing the temperature control functions effectively․
Installation and Setup
Proper installation ensures optimal performance․ Follow guidelines for cabinet leveling, securing the controller, and connecting electrical components․ Ensure all wires match the manual’s specifications for safe operation․
Cabinet Installation and Setup
For cabinet installation, begin by ensuring the unit is on a level surface․ Secure the cabinet using the provided hardware, following the manufacturer’s torque specifications․ Once leveled, install the castors or optional legs for stability․ Ensure all components are properly aligned and tightened to prevent vibration during operation․ Refer to the manual for specific diagrams and step-by-step instructions․ Proper installation is crucial for maintaining performance and longevity of the controller․ Always follow the sequence outlined in the manual to avoid misalignment or damage․ Additionally, ensure all safety precautions are taken, such as disconnecting power before starting the installation process․ This step ensures a safe and efficient setup․ Proper installation is the foundation for reliable operation․
Electrical Requirements and Wiring
Ensure the cabinet is connected to a power supply that meets the specified voltage and current ratings, as outlined in the manual․ Verify the wiring matches the controller’s requirements, using the correct gauge and connections to prevent overheating or damage․ Refer to the wiring diagram provided in the manual for accurate installation․ Ground the system properly to ensure safety and optimal performance․ If the controller is preprogrammed for specific functions, such as defrost cycles, ensure the wiring aligns with these settings․ Always follow local electrical codes and consult a licensed electrician if unsure․ Proper electrical setup is critical for safe and efficient operation of the True controller․ Adhere strictly to the manual’s guidelines to avoid electrical hazards and ensure reliability․ This step is essential for maintaining the longevity of your equipment․
Operating the True Controller
Learn to navigate the control panel, adjust settings, and perform essential functions․ Understand defrost cycles, temperature control, and operational modes to ensure efficient and smooth operation of your equipment․
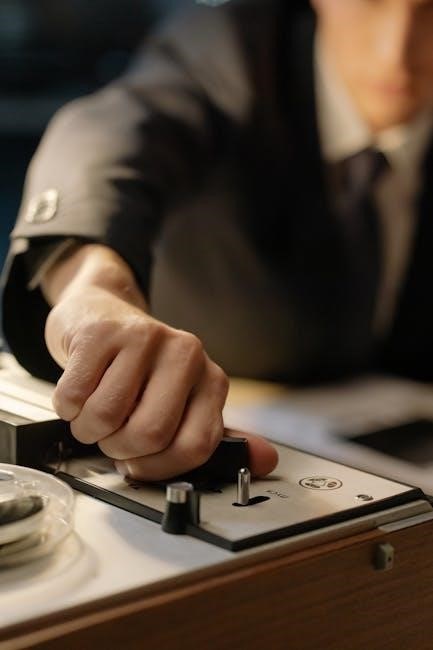
Understanding the Control Panel
The control panel is the central interface for managing your True Controller․ It features an intuitive design with buttons for adjusting settings, monitoring temperatures, and initiating functions like manual defrost․ The Info/Setpoint button allows you to view and modify temperature setpoints, while the Manual Defrost button enables defrost cycles․ Additional buttons may include options for decreasing settings or locking/unlocking the control panel․ The panel also provides real-time feedback on operational status, ensuring you can monitor performance effectively․ Familiarizing yourself with these components is essential for efficient and precise control of your equipment․ Refer to the manual for detailed instructions on button functions and advanced features to optimize your user experience․
Navigating the User Interface
Navigating the user interface of your True Controller is straightforward, with a menu-driven system designed for ease of use․ The interface typically features a clear display showing real-time data, such as temperature readings, operational status, and any active settings․ Use the navigation buttons to scroll through menus, access advanced features, and adjust parameters as needed․ The interface also provides visual feedback, ensuring you can monitor and control your equipment efficiently․ For users requiring additional guidance, detailed instructions for menu navigation and feature access are available in the manual․ Customization options may also be present, allowing you to tailor the interface to suit your specific needs․ Familiarizing yourself with these features will enhance your overall control and operational experience․

Maintenance and Troubleshooting
Regular maintenance ensures optimal performance and longevity of your True Controller․ Refer to the manual for troubleshooting common issues and proactive care tips to prevent malfunctions․
Regular Maintenance Tips
Regular maintenance is essential to ensure your True Controller operates efficiently․ Clean the control panel and sensors periodically to prevent dust buildup․ Check and calibrate temperature probes every 6 months for accuracy․ Update firmware regularly to access new features and improvements․ Inspect wiring and connections for wear or damage․ Replace any faulty components promptly to avoid system downtime․ Schedule professional servicing annually for complex diagnostics․ Keep the user manual handy for quick reference․ By following these tips, you can extend the lifespan of your controller and maintain optimal performance․
Common Issues and Troubleshooting Steps
Common issues with the True Controller include temperature inaccuracies, display malfunctions, and connectivity problems․ For temperature errors, check probe connections and recalibrate if necessary․ If the display is unresponsive, restart the controller or ensure proper power supply․ Connectivity issues may require resetting the network or updating firmware․ Consult the manual for detailed troubleshooting guides․ If problems persist, contact True Manufacturing support for assistance․ Regular maintenance can prevent many of these issues․ Always refer to the troubleshooting section in the manual for step-by-step solutions to ensure optimal performance․

Downloading and Accessing the Manual
Visit the official True Manufacturing website to download the True Controller Manual PDF․ Select your language and model to access the guide for proper installation and operation․
How to Download the True Controller Manual PDF
To download the True Controller Manual PDF, visit the official True Manufacturing website․ Navigate to the “Support” or “Resources” section․ Select your specific controller model from the dropdown menu․ Choose your preferred language to access the manual․ Click the “Download” button to save the PDF to your device․ Ensure your internet connection is stable for a smooth download process․ Once downloaded, open the PDF using a compatible viewer like Adobe Acrobat․ Review the manual thoroughly for installation, operation, and maintenance instructions․ For additional assistance, refer to the provided links or contact True customer support․ Always verify the manual’s authenticity by cross-checking the model number and publication date․ This ensures you have the correct guide for your True Controller․
Where to Find Additional Resources and Guides
For additional resources and guides related to the True Controller Manual, visit the official True Manufacturing website․ Navigate to the “Support” section, where you’ll find a dedicated page for manuals, troubleshooting guides, and technical documentation․ You can also search for specific model-related resources by entering your controller’s model number in the search bar․ Authorized True dealers and distributors often provide supplementary materials, including installation guides and user manuals․ Additionally, check the “Downloads” section for firmware updates, operation manuals, and maintenance tips․ For further assistance, contact True’s customer support team directly or refer to the “Contact Us” page for regional support information․ Ensure you only use resources from verified sources to maintain accuracy and reliability․