K9 training is a comprehensive approach to developing dogs for various roles, from basic obedience to advanced tasks like scent detection and protection. It emphasizes consistency, positive reinforcement, and building a strong bond between dog and handler, ensuring effective communication and reliability in real-world scenarios.
1.1 Importance of K9 Training
The importance of K9 training lies in enhancing obedience, scent detection, and protection skills, ensuring reliability in real-world scenarios. It strengthens the bond between dogs and handlers, fostering trust and communication. Proper training prepares K9s for critical roles in law enforcement, search and rescue, and public safety, making them indispensable assets.
1.2 Brief History of K9 Units
K9 units trace their origins to ancient times, with dogs used in military and protective roles by Egyptians and Romans. Modern K9 units emerged during World War I and II, becoming integral to detection, patrol, and combat missions. Their versatility and trainability solidified their role in law enforcement and counter-terrorism, making them indispensable today.
Obedience Training
Obedience training is the essential foundation for K9 development, focusing on clear communication and structured exercises to establish trust and discipline between the dog and handler.
2.1 Basic Commands
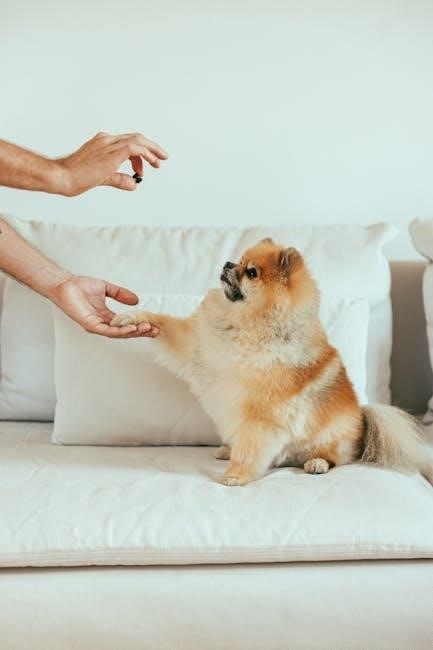
Basic commands such as “sit,” “stay,” “down,” “heel,” and “come” form the cornerstone of K9 training. These commands establish clear communication and set the foundation for more advanced tasks. Positive reinforcement and consistency are key to teaching these fundamentals effectively, ensuring reliability in various situations.
2.2 Advanced Commands
Advanced commands like “stay close,” “figure-eights,” and “send aways” refine a dog’s responsiveness and precision. These commands build on basic obedience, enhancing focus and reliability. Techniques such as hand signals and verbal cues are refined, enabling dogs to perform complex tasks with confidence and accuracy in challenging environments.
2.3 Consistency in Training
Consistency is key to successful K9 training, ensuring clear communication and reliable performance. Regular, structured sessions with positive reinforcement and clear boundaries help dogs understand expectations. Handlers must maintain uniform commands and rewards, fostering trust and accelerating learning, while adapting routines to maintain engagement and prevent boredom.
Scent and Detection Training
Scent and detection training teaches dogs to identify specific odors, crucial for police operations and search missions. Positive reinforcement and structured exercises enhance their ability to locate substances accurately and efficiently.
Scent work is a form of detection training where dogs learn to identify specific odors. It is widely used in police operations and search missions. Positive reinforcement and structured exercises help build a strong foundation, making it engaging for dogs while enhancing their ability to locate substances accurately and efficiently.
3.2 Methods for Detection Training
Detection training involves teaching dogs to locate specific scents using positive reinforcement and structured exercises. Methods include hide-and-seek games, scent article drills, and environmental exposure to build accuracy. Drive development and clear communication enhance focus, ensuring reliable performance in various scenarios and improving detection efficiency over time.
3.3 Real-World Applications
K9 detection training is vital for law enforcement, search and rescue, and public safety. Dogs are deployed for drug detection, explosive identification, and tracking suspects. Their keen sense of smell aids in locating missing persons, detecting contraband, and ensuring security in high-risk environments, making them indispensable assets in real-world operations.
Police and Protection Training
Police and protection training prepares dogs for law enforcement roles, focusing on patrol duties, suspect apprehension, and securing environments. It builds trust and ensures dogs respond reliably in high-stakes situations.
4.1 Basic Patrol Training
Basic patrol training teaches dogs to navigate various terrains, respond to commands, and remain focused in public settings. Handlers learn to read body language and maintain control, ensuring a cohesive team effort for effective police operations and public safety.
4.2 Protection Techniques
Protection techniques involve training dogs to defend their handlers and respond to threats. This includes controlled aggression exercises, decoy work, and scenario-based drills. Positive reinforcement and clear communication ensure the dog remains calm yet assertive, balancing safety with effectiveness in high-stress situations.
4.3 Police-Specific Training Methods
Police-specific training methods focus on preparing K9s for law enforcement roles. This includes scenarios like suspect apprehension, crowd control, and tactical operations. Handlers use advanced commands, decoy techniques, and simulation exercises to ensure dogs perform reliably in high-pressure environments, maintaining public safety and officer protection as priorities.
Socialization and Behavior Training
Socialization and behavior training are crucial for K9s, focusing on positive interactions, environmental adaptation, and addressing behavioral issues through structured techniques and positive reinforcement methods.
5.1 Puppy Socialization
Puppy socialization is the foundation of K9 training, starting from 8-10 weeks old. It involves introducing puppies to new environments, people, and experiences to foster confidence and calmness in diverse situations, ensuring they grow into well-adjusted and responsive adult dogs.
5.2 Understanding Canine Body Language
Understanding canine body language is crucial for effective communication. Dogs convey emotions through tail positions, ear posture, and facial expressions. Recognizing signals like a tucked tail (fear) or raised hackles (tension) helps handlers interpret their K9’s moods, ensuring harmonious training and interaction.
5.3 Behavior Correction Techniques
Behavior correction involves addressing unwanted actions through positive reinforcement, redirection, and clear boundaries. Consistency and calm energy help dogs understand expectations, fostering trust. Techniques like interrupting bad habits and rewarding desired behaviors promote long-term improvement, ensuring a well-adjusted and responsive K9 partner.
Nutrition and Health
Nutrition and health are foundational for K9 performance, ensuring energy, strength, and longevity. A balanced diet, proper exercise, and regular monitoring are essential to prevent issues and maintain peak condition.
6.1 Dietary Needs for K9s
A balanced diet is crucial for K9s, ensuring optimal energy and health. High-protein foods, essential vitamins, and minerals are vital, with hydration being a top priority. Tailoring diets to specific roles and life stages maximizes performance and prevents health issues, supporting their demanding responsibilities effectively.
6.2 Exercise Requirements
K9s need regular, tailored exercise to maintain physical and mental health. Activities like agility drills, obedience training, and scent work provide stimulation. Daily routines should balance play and structured workouts, ensuring dogs remain fit, focused, and ready for their specific roles while preventing health issues through consistent physical activity.
6.3 Health Monitoring
Regular veterinary check-ups, monitoring for signs of injury or stress, and dietary adjustments are essential for maintaining K9 health. Tracking exercise intensity and recovery ensures optimal physical condition, preventing burnout and promoting longevity in their active roles.
Types of Training Methods
K9 training employs various methods, including positive reinforcement, clicker training, and electronic collars, each tailored to enhance learning efficiency and ensure effective communication between dogs and handlers.
7.1 Positive Reinforcement
Positive reinforcement is a powerful training method that rewards desired behaviors with treats, praise, or play, encouraging repetition; It fosters a positive learning environment, builds trust, and promotes clear communication between the dog and handler, making it highly effective for K9 training.
7.2 Clicker Training
Clicker training uses a small device to mark desired behaviors with a distinct sound, followed by rewards. This method enhances precision and speed in learning, allowing dogs to quickly associate actions with positive outcomes, making it a popular choice for both basic and advanced K9 training.
7.3 Use of Electronic Collars
Electronic collars, when used correctly, can aid in off-leash training and address behavioral issues. They deliver mild stimuli to refocus a dog, ensuring safety and obedience. Proper training and responsible use are crucial to avoid negative associations and maintain trust between the dog and handler during K9 training sessions.
Off-Leash Training
Off-leash training empowers dogs to respond reliably without physical constraints, fostering trust and control. It begins with foundational obedience and progresses to distractions, ensuring safety and focus in real-world scenarios.
8.1 Building a Foundation
Building a foundation for off-leash training involves establishing clear communication and trust. Start with basic commands like “sit,” “stay,” and “recall,” ensuring reliability in controlled environments. Gradually introduce distractions to strengthen focus and obedience, creating a solid base for advanced off-leash scenarios. Consistency and positive reinforcement are key to success.
8.2 Strategies for Success
Success in off-leash training relies on consistent reward systems, clear communication, and gradual exposure to distractions. Use high-value rewards to reinforce desired behaviors, and practice in controlled environments before advancing to open spaces. Focus on building trust and ensuring your dog understands commands without relying on the leash.
8.3 Safety Tips
Always train in secure, hazard-free areas to prevent accidents. Use a reliable recall system and ensure your dog is microchipped. Avoid off-leash training near roads or unstable environments. Monitor your dog’s physical condition and avoid extreme weather. Keep identification tags visible and stay alert to surroundings for a safe experience.
Protection Training
Protection training is a specialized area focusing on teaching dogs to respond to threats. It involves controlled exercises to build confidence and defensive skills, ensuring safety and reliability in critical situations while adhering to ethical practices.
9.1 Basic Protection Exercises
Basic protection exercises introduce foundational skills, such as controlled aggression and defensive responses. These exercises use positive reinforcement and gradual exposure to simulated threats, teaching dogs to respond confidently while remaining under handler control. They emphasize clear communication and ethical training practices to build trust and reliability in protective scenarios.
9.2 Decoy Techniques
Decoy techniques involve using trained individuals in protective gear to simulate real-life scenarios, teaching dogs to respond appropriately. These exercises focus on bite work, releases, and controlled aggression, ensuring dogs can distinguish between threats and non-threats; Proper equipment and clear commands are essential for safe and effective training outcomes.
9.3 Advanced Protection Scenarios
Advanced protection scenarios simulate real-world threats, such as multiple attackers or dynamic environments. Dogs learn to adapt, prioritize threats, and respond decisively. These exercises enhance decision-making under stress and refine instinctual reactions, ensuring reliable performance in high-stakes situations.
Agility Training
Agility training enhances a dog’s fitness, coordination, and focus through obstacle courses with tunnels, jumps, and weave poles. It strengthens the bond between dog and handler, promoting trust and clear communication while providing mental and physical stimulation.
10.1 Benefits of Agility
Agility training boosts physical fitness, coordination, and mental focus, offering mental stimulation. It enhances social skills, builds confidence, and strengthens the bond between dog and handler, using tunnels, jumps, and weave poles to promote a dynamic, engaged lifestyle for K9s, improving overall well-being and clarity in communication while fostering joy and teamwork.
10.2 Setting Up a Course
Setting up an agility course involves selecting essential equipment like tunnels, jumps, and weave poles. Choose a spacious, safe area with clear pathways. Start with basic obstacles for beginners and gradually incorporate advanced elements. Ensure proper spacing and safety measures to prevent injuries, allowing handlers to guide their K9s through a challenging yet engaging layout.
10.3 Training Tips
Begin with short sessions, focusing on one obstacle at a time. Use positive reinforcement like treats and praise to encourage confidence. Guide your dog through the course calmly, ensuring clear communication. Gradually increase difficulty as your K9 becomes more skilled, always ending on a positive note to maintain motivation and enjoyment.
Creating a Training Program
A well-structured K9 training program starts with clear goals and a tailored schedule, ensuring consistency and gradual progression. Regularly track progress to adjust methods and maintain effectiveness, keeping sessions engaging and purposeful for optimal results.
11.1 Setting Goals
Setting clear, realistic goals is essential for effective K9 training. Align objectives with the dog’s role, using measurable milestones. Tailor goals to the dog’s experience and abilities, ensuring progression. Regularly assess and adjust targets to maintain motivation and celebrate progress, fostering a focused and productive training journey.
11.2 Sample Training Schedule
A sample K9 training schedule includes daily sessions divided into obedience, task-specific drills, and socialization. Allocate 30 minutes for basic commands, 20 minutes for scent or agility, and 10 minutes for behavior exercises. Rotate activities weekly to maintain engagement, ensuring balance and avoiding overtraining, while tracking progress systematically.
11.3 Tracking Progress
Regularly track progress through detailed logs, evaluating milestones, and assessing improvements in behavior and task mastery. Use positive reinforcement to maintain motivation and adapt training strategies as needed. Celebrate small achievements and adjust the program to address challenges, ensuring steady growth and measurable success in your K9 training journey.