Diet cookbooks are essential guides for adopting healthier eating habits, offering diverse recipes and meal plans tailored to specific dietary needs. They provide practical tips, nutritional advice, and easy-to-follow instructions, helping individuals achieve their health goals through balanced and flavorful meals.
Overview of Diet Cookbooks
Diet cookbooks are comprehensive resources offering tailored recipes and meal plans for specific dietary goals, such as weight loss, improved health, or managing chronic conditions. They often cater to popular diets like Mediterranean, keto, or vegan lifestyles, providing step-by-step instructions and nutritional advice. These cookbooks aim to simplify healthy eating by including grocery lists, cooking tips, and time-saving strategies. Many feature quick, budget-friendly recipes, making them accessible to individuals with busy schedules. They also emphasize balanced nutrition, ensuring meals are both delicious and beneficial for overall well-being.
Importance of Healthy Eating
Healthy eating is foundational for overall well-being, improving energy levels, and preventing chronic diseases. Diet cookbooks emphasize balanced nutrition, guiding individuals to make informed food choices that align with their health goals. By focusing on nutrient-rich ingredients and diverse meal options, these resources help reduce the risk of conditions like heart disease and diabetes. They also promote sustainable eating habits, encouraging the use of fresh, whole foods to create flavorful and nourishing meals that support long-term health and vitality.
Popular Types of Diet Cookbooks
Diet cookbooks cater to various preferences, including Mediterranean, Keto, Vegan, and Alkaline diets. Each type offers tailored recipes and meal plans to suit specific health and lifestyle goals.
Mediterranean Diet Cookbooks
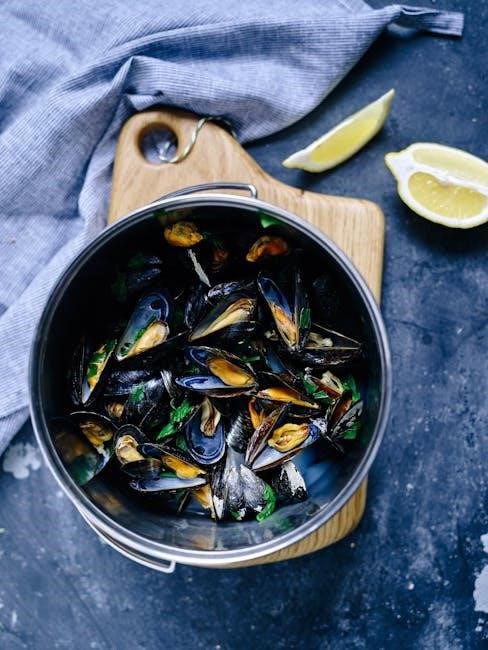
Mediterranean diet cookbooks emphasize fresh, wholesome ingredients like fruits, vegetables, whole grains, and healthy fats, inspired by traditional Mediterranean cuisine. Recipes often feature olive oil, herbs, and seafood, promoting heart health and weight management. Many cookbooks provide 30-minute meal solutions, making it easy to incorporate this diet into busy lifestyles. They also highlight the benefits of reducing chronic disease risks through balanced nutrition, offering a variety of delicious and authentic dishes to support overall well-being and longevity.
Keto Diet Cookbooks
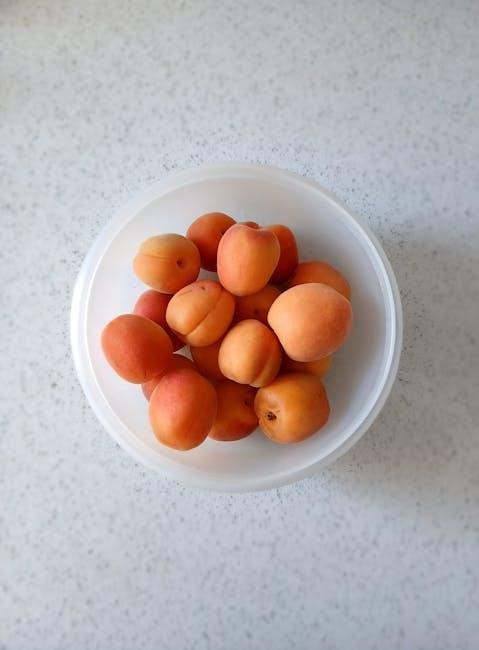
Keto diet cookbooks focus on low-carb, high-fat recipes designed to promote weight loss and improve metabolic health. They offer a variety of meals, from breakfast options like Greek yogurt with granola to hearty dinners, ensuring nutritional balance. Many cookbooks include quick, 30-minute recipes, making the keto lifestyle accessible and sustainable. With detailed guides on macronutrient ratios, these books help individuals transition to a ketogenic diet seamlessly, supporting their journey toward a healthier and more energized lifestyle with delicious and satisfying meals.
Vegan and Vegetarian Diet Cookbooks
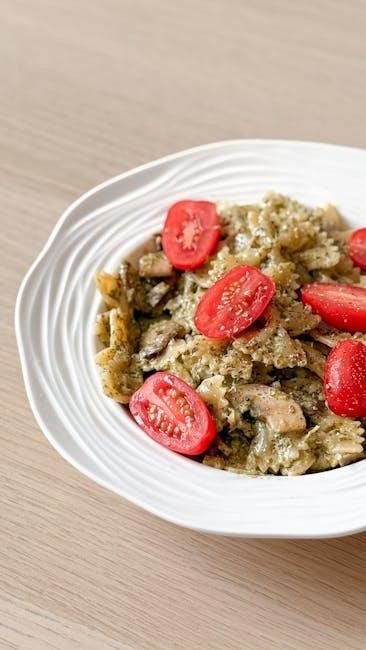
Vegan and vegetarian diet cookbooks emphasize plant-based recipes, offering creative and nutritious meal ideas. They often include tips for incorporating fresh fruits, vegetables, and whole grains, ensuring balanced nutrition. These cookbooks cater to various dietary preferences and provide versatile meal options, from hearty bowls to alkaline-based dishes. They also address common challenges, such as finding substitutes for animal products, making it easier for individuals to adopt a plant-centric lifestyle. With a focus on health and sustainability, these cookbooks inspire delicious and ethical eating.
Benefits of Using a Diet Cookbook
Diet cookbooks offer structured meal plans, time-saving recipes, and cost-effective strategies, providing nutritional guidance for a balanced and sustainable eating routine.
Time-Saving Recipes
Diet cookbooks provide quick and efficient meal solutions, perfect for busy lifestyles. Many recipes require minimal prep time, with options like 30-minute meals or one-pot dishes. They often include streamlined ingredient lists and simple instructions, ensuring meals are ready fast without sacrificing flavor or nutrition. Features like meal prepping tips and grocery lists further enhance time efficiency, making healthy eating accessible even on the most hectic days.
Cost-Effective Meal Planning
Diet cookbooks emphasize budget-friendly meal planning, offering recipes that use affordable, accessible ingredients. Many include strategies for reducing food waste and maximizing pantry staples. By focusing on seasonal produce and bulk purchases, these cookbooks help readers save money while maintaining nutritional balance. They often feature grocery lists and budget tips, ensuring that healthy eating remains affordable without compromising on taste or variety.
Healthy and Balanced Nutrition
Diet cookbooks prioritize healthy and balanced nutrition by offering recipes rich in essential nutrients, vitamins, and minerals. They often focus on whole foods, lean proteins, and fiber-rich ingredients, ensuring meals are both nourishing and delicious. Many cookbooks include nutritional information, helping readers make informed choices. By emphasizing variety and portion control, these guides promote long-term health benefits, such as improved energy levels, better digestion, and reduced risk of chronic diseases, aligning with overall wellness goals.
How to Choose the Right Diet Cookbook
Selecting the right diet cookbook involves aligning it with your dietary goals, checking for detailed nutritional information, and reading reviews to ensure it suits your lifestyle and preferences.
Understanding Your Dietary Needs
Identifying your dietary needs is crucial for selecting the right cookbook. Consider factors like calorie intake, food preferences, and health conditions. For instance, if you aim to reduce heart disease risk, focus on cookbooks emphasizing whole grains and lean proteins. Additionally, evaluate your lifestyle—busy individuals may prefer quick, 30-minute recipes. Aligning your choices with these factors ensures the cookbook meets your goals and sustains long-term adherence to a healthy diet.
Checking for Nutritional Information
When selecting a diet cookbook, ensure it provides detailed nutritional information for each recipe. Look for calorie counts, macronutrient breakdowns, and serving sizes to align with your dietary goals. Many cookbooks include nutritional facts, such as protein, fat, and fiber content, helping you make informed choices. Additionally, some books offer meal plans with balanced nutrient distributions, ensuring you meet daily dietary requirements. This feature is especially beneficial for those managing health conditions or aiming for specific wellness outcomes.
Reading Reviews and Ratings
Reading reviews and ratings is crucial when selecting a diet cookbook. Check for feedback from users, dieticians, and experts to ensure the cookbook meets your dietary needs. Look for ratings on platforms like Amazon or publisher websites. Pay attention to comments about recipe clarity, taste, and nutritional accuracy. Many cookbooks are reviewed by professionals, ensuring the content is reliable. Positive reviews often highlight ease of use and effectiveness, helping you make an informed decision. This step ensures you choose a cookbook that aligns with your health and culinary goals.

Using Diet Cookbooks Effectively
Maximize your diet cookbook by following structured meal plans, grocery lists, and step-by-step recipes. Plan ahead, prep ingredients, and stay consistent for the best results.
Meal Prepping Tips
Effective meal prepping starts with planning your weekly meals and creating a grocery list. Dedicate time on weekends to prepare ingredients like chopped vegetables, cooked proteins, and grains. Store prepped items in airtight containers to maintain freshness. Consider making bulk recipes like roasted tomatoes or muesli for quick access. Organize your fridge to ensure visibility of prepped meals, reducing food waste; Adjust portions based on dietary needs and family preferences. Check off items you already have to avoid overbuying. This approach saves time, reduces stress, and keeps you on track with your health goals.
Grocery Shopping Strategies
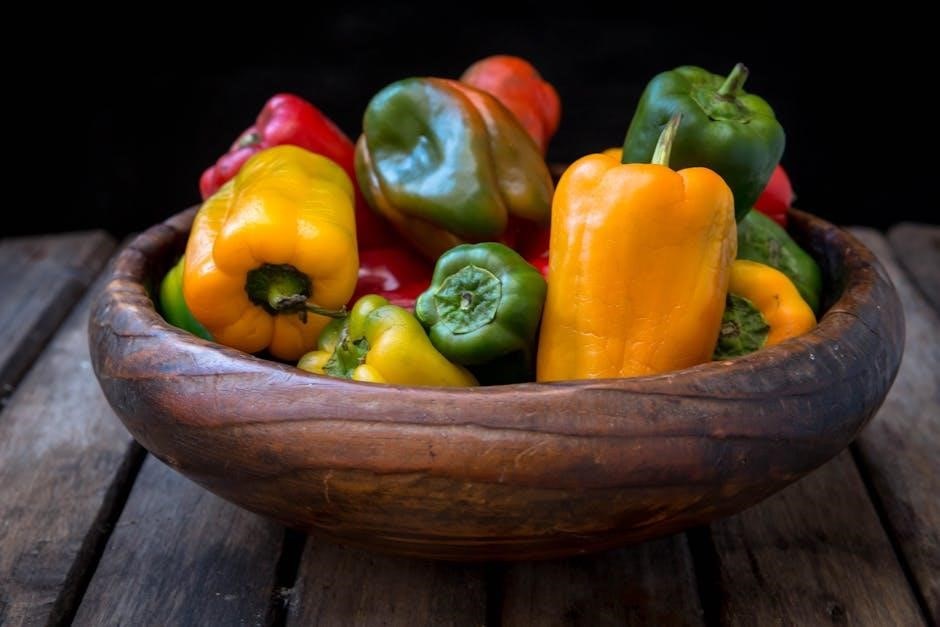
A well-organized grocery list is key to successful meal planning. Focus on fresh, seasonal produce and whole foods to ensure variety and nutrition. Buy ingredients in bulk to save money and reduce waste, while utilizing food substitutes to adapt recipes to your preferences. Avoid processed foods by prioritizing whole grains, lean proteins, and healthy fats. Adjust your list based on family needs and preferences, ensuring you have essentials for balanced meals. Proper planning ensures you stay on track with your dietary goals and reduces impulse purchases.
Staying Motivated with New Recipes
Discovering new recipes keeps your diet journey exciting and prevents boredom. Explore diverse cuisines and flavors to maintain enthusiasm. Quick, budget-friendly meals like Greek yogurt parfaits or one-pot dishes inspire creativity. Rotate ingredients seasonally to keep meals fresh and nutritious. Sharing meals with others or trying new cooking techniques can reignite passion for healthy eating. Experimenting with substitutes and variations ensures meals remain engaging while aligning with your dietary goals. New recipes foster a sense of accomplishment and joy in cooking, making your journey sustainable and enjoyable.
Common Features of Diet Cookbooks
Diet cookbooks often include step-by-step guides, calorie counts, and meal variety. They feature fresh, easy recipes with tips for grocery shopping and balanced nutrition planning.
Step-by-Step Instructions
Diet cookbooks provide clear, detailed step-by-step instructions, ensuring recipes are easy to follow. These guides often include meal prepping tips and grocery shopping strategies, making healthy cooking accessible. With focus on simplicity, they help users achieve cooking success. Many cookbooks offer adorable meals and practical methods, catering to diverse skill levels. Whether you’re a beginner or a busy professional, these instructions empower you to prepare nutritious dishes with confidence, ensuring every recipe turns out delicious and satisfying.
Calorie and Nutrient Calculations
Diet cookbooks often include detailed calorie and nutrient calculations, helping users track their intake. These resources provide precise information on proteins, carbs, and fats, ensuring meals align with dietary goals. Nutritional facts are clearly presented, making it easier to manage portion sizes and balance meals. This feature is particularly useful for those with specific health needs or restrictions, enabling informed decisions for a healthier lifestyle. Such calculations also help in maintaining accountability and transparency in meal planning.
Variety of Meal Options
Diet cookbooks offer a wide range of meal options to suit diverse preferences and dietary needs. From breakfast to dinner, snacks, and desserts, these books provide creative and nutritious recipes. They often include options for quick meals, budget-friendly ideas, and dishes tailored to specific diets like Mediterranean, Keto, or Vegan. This variety ensures that meals remain exciting and balanced, catering to different lifestyles and preferences. With such diversity, users can explore new flavors while staying committed to their health goals. This makes diet cookbooks versatile tools for sustainable eating habits.
Diet cookbooks are invaluable resources for transforming eating habits, offering practical recipes and expert guidance. They empower individuals to make informed choices, fostering healthier lifestyles effortlessly;
Final Thoughts on Diet Cookbooks
Diet cookbooks are indispensable tools for health-conscious individuals, offering practical, flavorful recipes tailored to diverse dietary needs. They empower users to adopt balanced eating habits, promoting long-term well-being. With a focus on quick, cost-effective, and nutritious meals, these cookbooks cater to busy lifestyles while fostering a deeper understanding of healthy eating. Whether for weight loss, chronic disease management, or overall wellness, diet cookbooks provide the guidance and inspiration needed to transform eating habits and embrace a healthier, tastier way of living.
Encouragement to Start Your Journey
Embracing a healthier lifestyle begins with small, manageable steps. Diet cookbooks offer a wealth of inspiration, providing delicious, easy-to-follow recipes that cater to diverse dietary needs. With practical meal plans and expert tips, these cookbooks empower you to create balanced, nutritious meals without sacrificing flavor. Start your journey today—discover how simple it can be to prioritize your health and well-being while enjoying mouthwatering dishes that nourish both body and soul. Your path to a healthier, happier you begins here!